04 Jun Enabling AudioCodes Compliance Recording SmartTAP Teams App integration for the Microsoft Teams Desktop Client
AudioCodes has a really cool integration with the Microsoft Teams client that enables an administrator or a compliance call recorded user to be able to manage the SmartTAP server or see their recordings. This is certainly a very useful feature so CR users can listen to recordings easily from within their Teams client. There are a few moving parts to get this integration to work, namely integration your SmartTAP with your Azure AD instance. If you’ve followed the steps for enabling AAD integration in my previous blog post here then you’re part way there! There are some important caveats to get the SmartTAP Teams App to work though which I’ll cover in this blog post.
Step 1 – SmartTAP must be published to the internet
This is the most important step. As your Microsoft Teams client will be accessing your SmartTAP directly via its FQDN you’ll need to have an A record in public DNS for your ST instance along with a static Public IP. And the FQDN for the ST must be browsable from the Internet. EG you should be able to access your ST web UI from a PC on the internet.
https://example.domain.com/smarttap/status/target_status.jsf
This URL needs to be browsable locally on the server as well as from the Internet. So you’ll need to ensure the DNS resolver used on your server points to the internal IP address of your ST. Likewise Public DNS needs to have an A record pointing to the Public IP address of your ST. I will not be covering those elementary configuration steps here but be warned if the ST isn’t accessible from the Public Internet the ST Teams App integration will not work!
If your ST is not already enabled with your own FQDN and is still using the system default hostname ‘SIPREC’ the ST will need to be renamed to the correct hostname/FQDN.
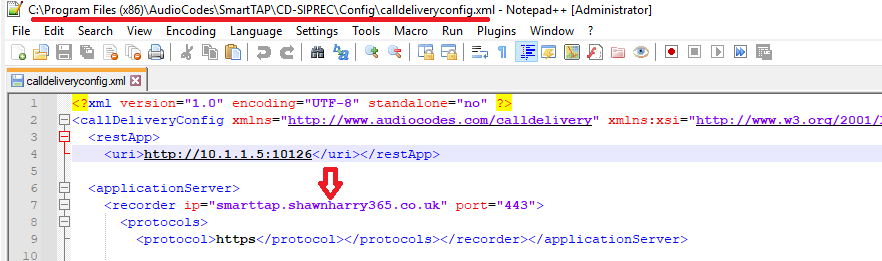
I couldn’t see an elegant way to do this from the web UI so had to edit a config file instead to change my ST hostname from the default. From Windows Explorer browse to the “calldeliveryconfig.xml” and change the “Recorder IP” to the correct FQDN and then restart the AudioCodes Application Service for the new FQDN to take effect.
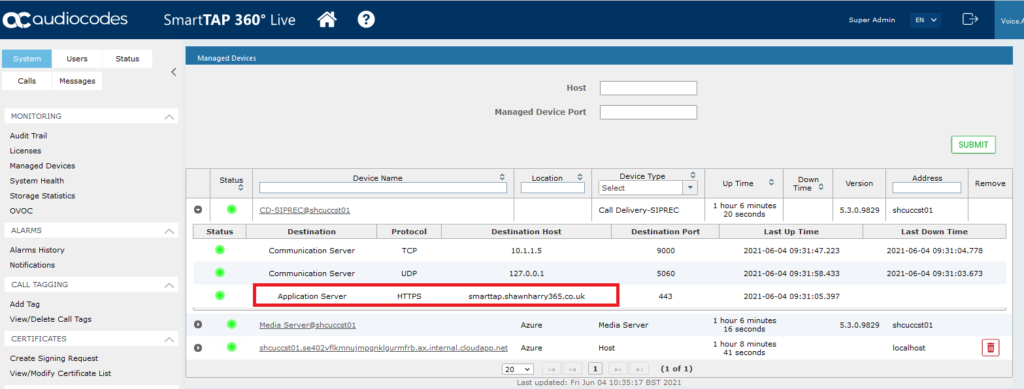
If you then browse to manage devices you should see the updated FQDN
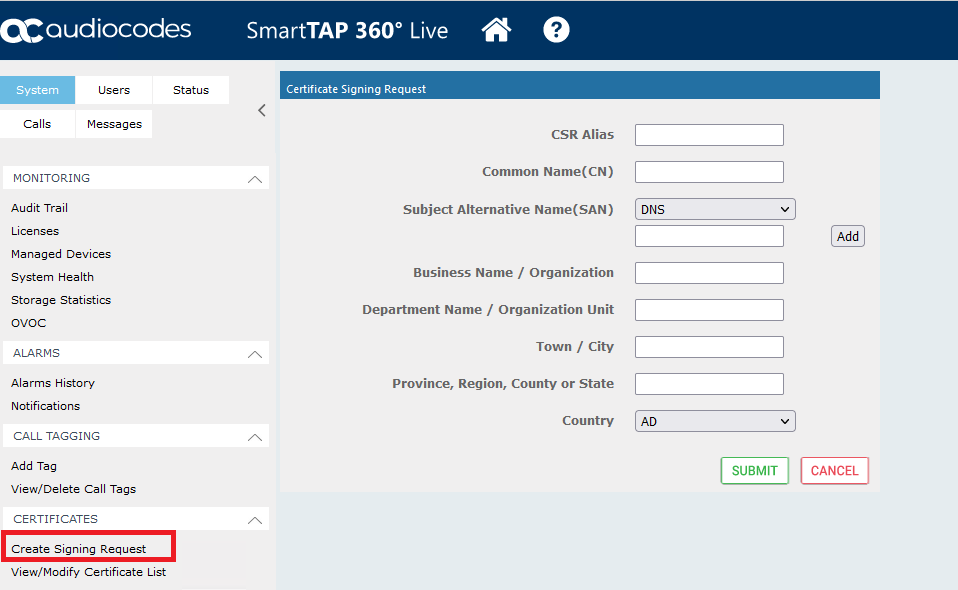
As the Application ‘Web’ Service is advertised on SSL, and the default certificate will not contain the correct SAN/FQDN of your ST a new certificate needs to be created. For a production deployment you absolutely want to use a certificate from a Public CA. But because this is a quick and dirty lab I used a self signed certificate issued by the ST itself.
Creating the new certificate/CSR is very straight forward. Enter your details into the form and ensure you’ve added the ST FQDN as a SAN entry. Once submitted browse to View/Modify Certificate List and export the certificate to your desktop.
As the certificate is self-signed it must be imported into the Trusted Root on your server. Ensure its imported into the Local Computer container which ensures any user logging onto the server will automatically trust the certificate too.
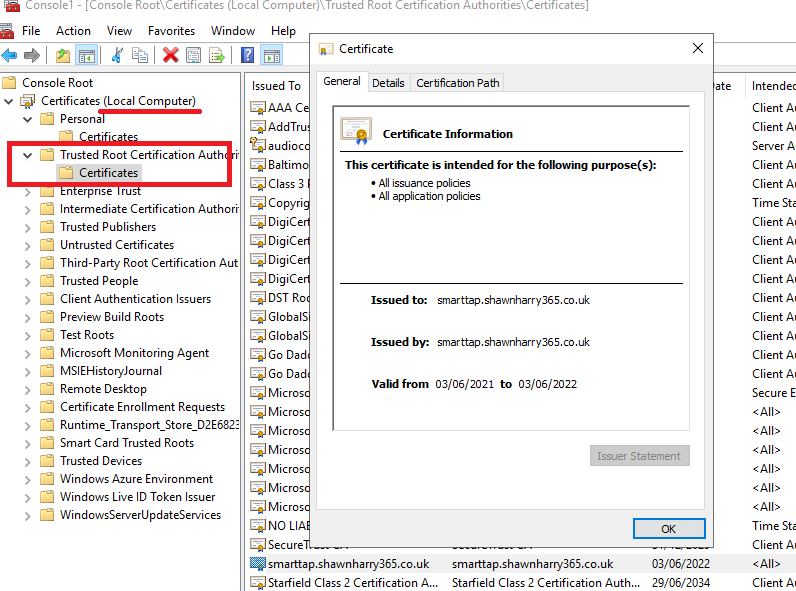
This certificate will also need to be imported into the Trusted Root of the PC being used for the SmartTAP Teams App. This is an important step as if the certificate is not trusted then the Teams client will reject connections from the Teams ST App to your ST and all you’ll see is a grey pane of glass in the app! So be warned!
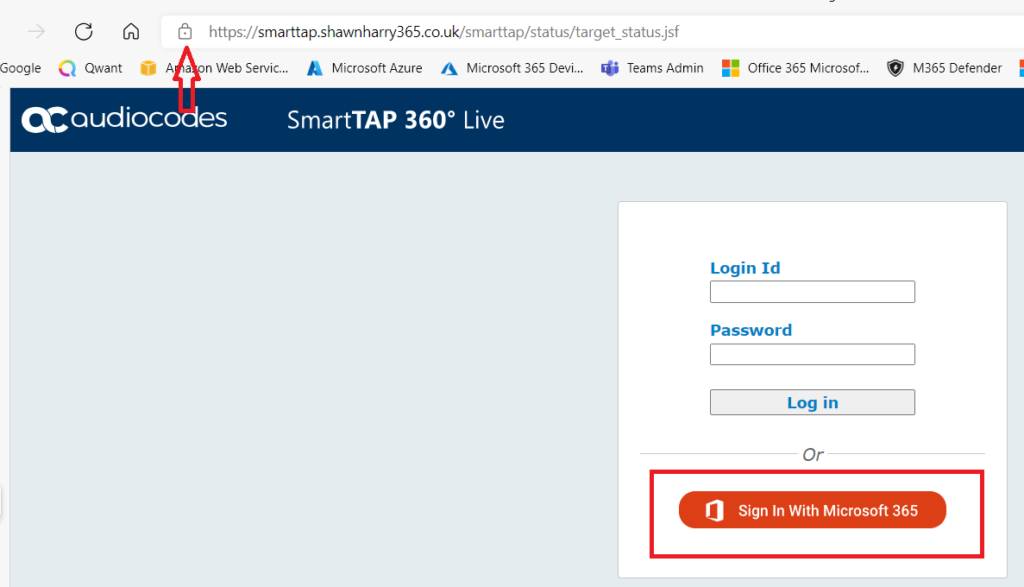
Assuming you’ve completed all the steps in my previous blog post here as well as the above you should now be able to browse to the web login of your ST and see two things. 1) The sign in with Microsoft 365 radio button, and 2) The certificate for the website should show as trusted with the padlock sign per below.
Step 2 – Update App Registration
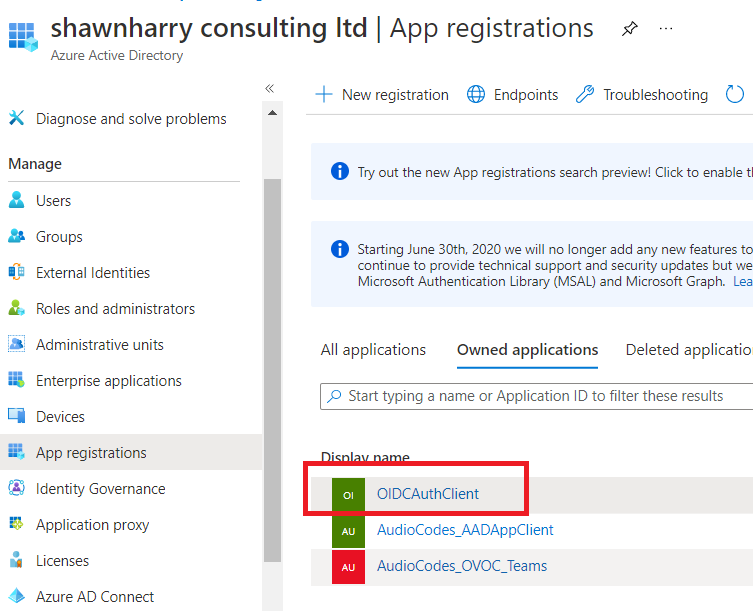
The following configuration will enable an AAD account that’s been synchronised to ST to login successfully to ST over the Internet. If you notice in my previous blog post the ST was pointed at the local host FQDN for its redirect URI. This needs to be changed to the FQDN of the ST, but before we do this the correct permissions must be assigned to the App Registration account that’s being used to authenticate AAD ST users. Browse to the App Registration that you configured for ST authentication.
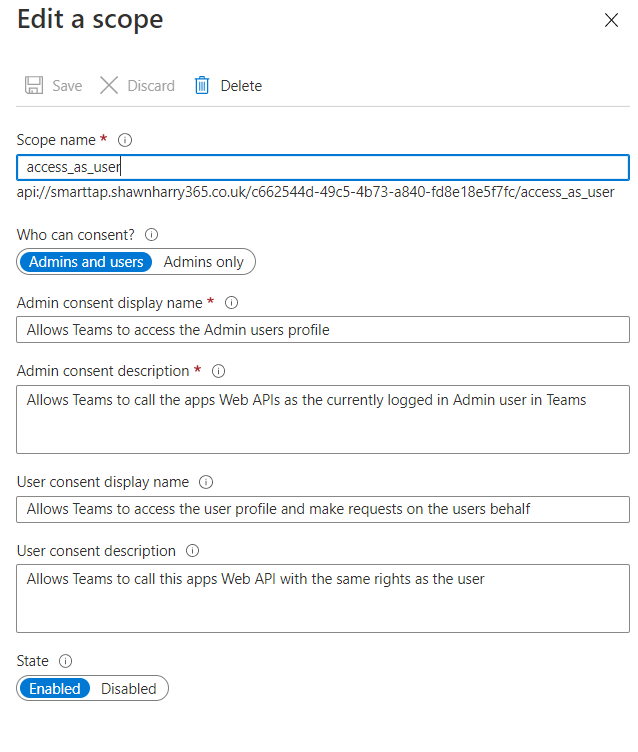
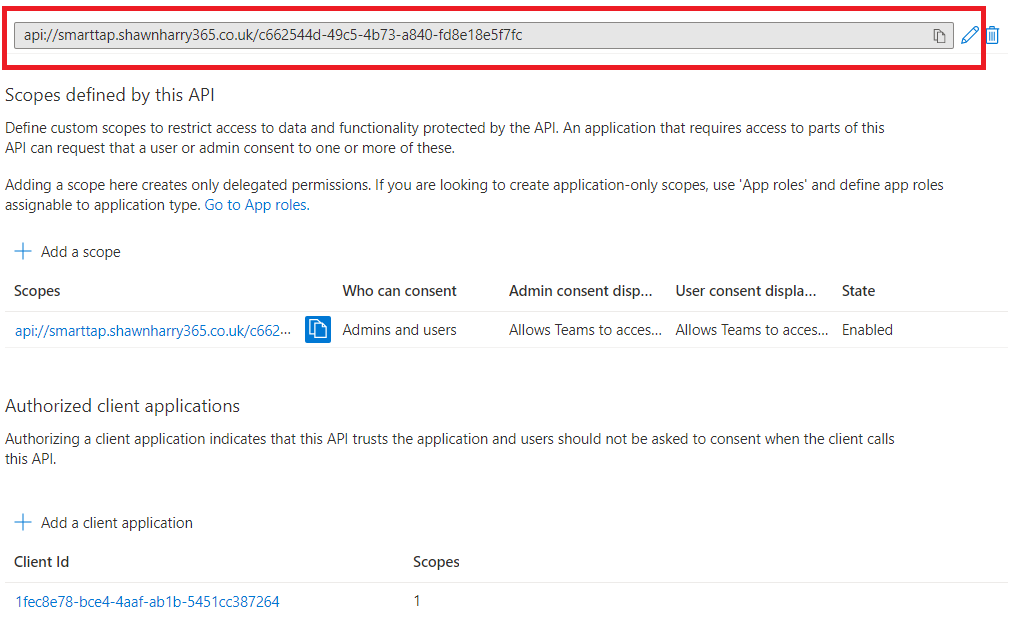
Select Expose API and then Add a Scope and enter the FQDN of your ST then entering all the details in the fields below ensuring the scope is enabled.
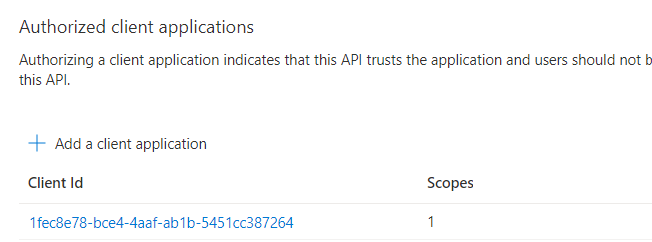
Under Authorized Client Applications Add a client application and ensure the following GUID is added (without the quotes) “1fec8e78-bce4-4aaf-ab1b-5451cc387264”. This string is the GUID or User Agent used by the Teams desktop and mobile applications when attempting to authenticate. If you do not add this GUID as an authorised client application you will experience authentication failure until this GUID is added. So make sure you dont miss this step! Make sure the Authorized Scope box is checked and then add the application.
Make a note of the API string below as you will need this later when updating the ST Teams App manifest config file.
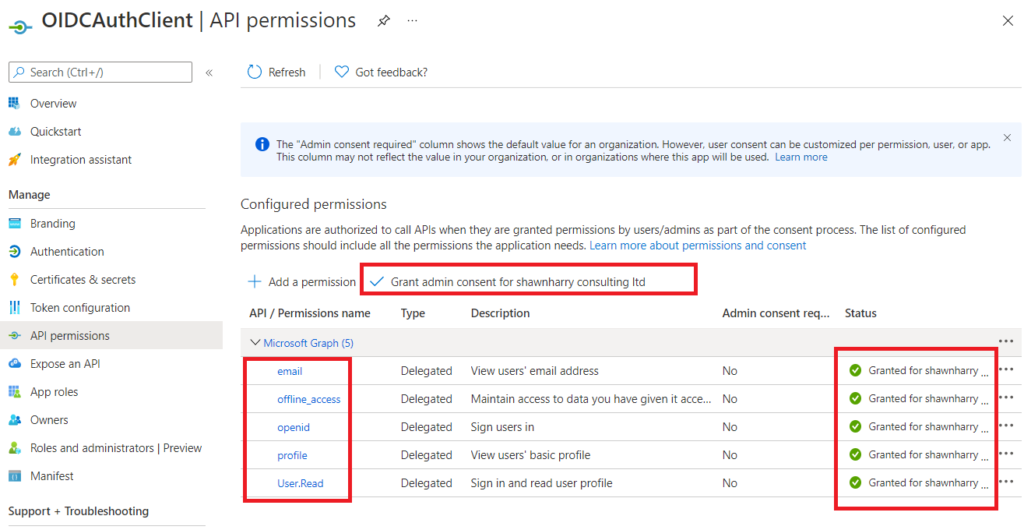
From API Permissions add the following Graph permissions. Ensure you grant admin consent so that users are not prompted to grant consent the first time they use the app.
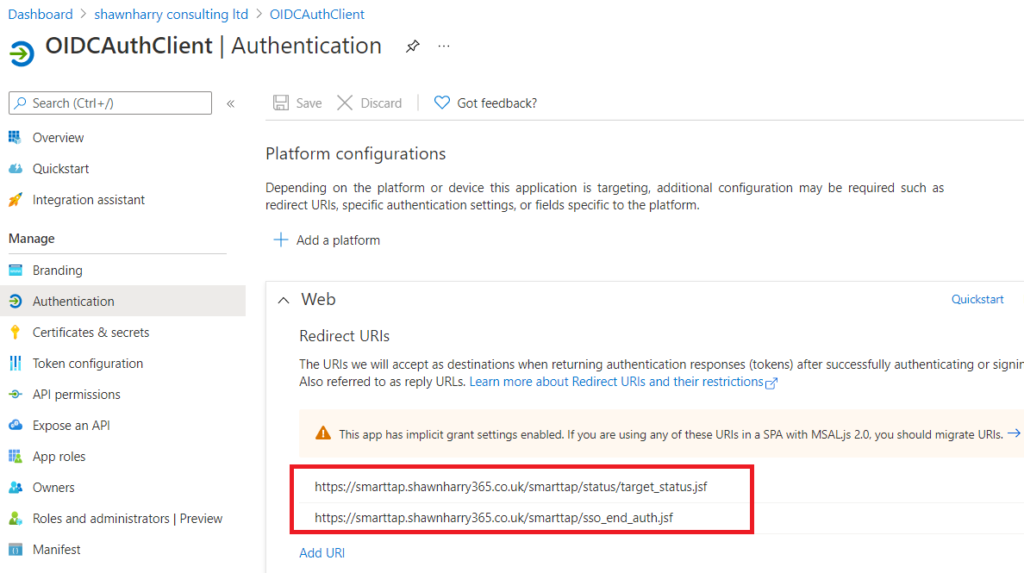
Under the Authentication tab enter the redirect URIs you see below replacing the FQDN in the example below with the FQDN of your ST.
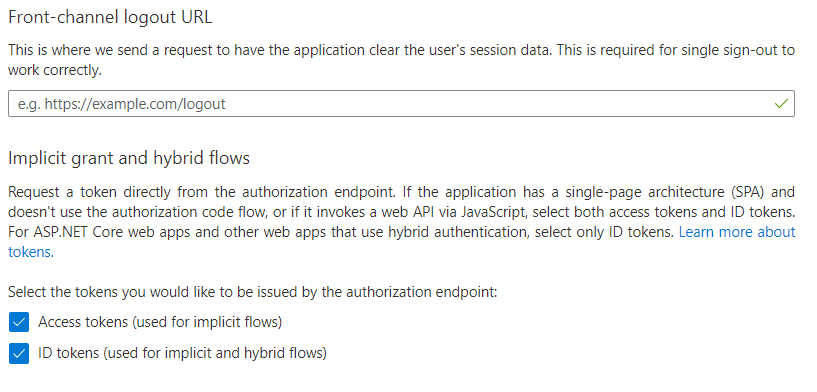
Make sure the ID Token and Access Token boxes are checked.
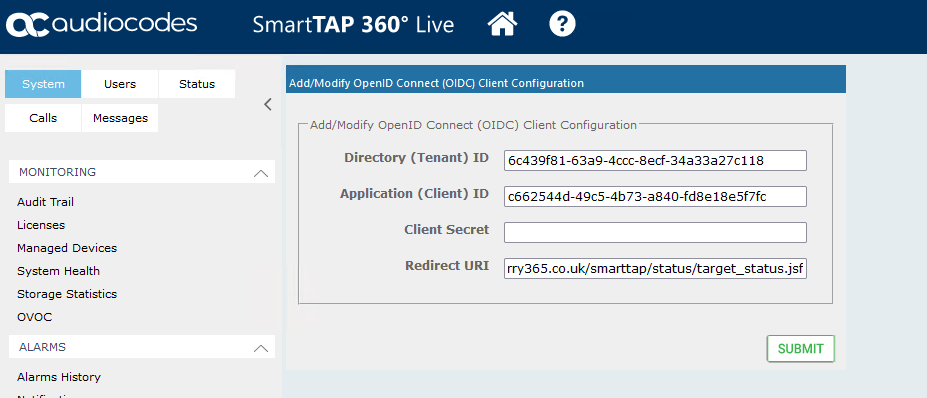
From the ST web UI select OpenID Connect and update your details. If you’ve lost your client secret just generate a new one. But ensure the Tenant and Client ID as well as the redirect URI match what you’ve configured in the App Registration details. Once this is done ensure you can authenticate and sign-in using your AAD credentials to the ST web UI from the Internet.
Step 3 – Configure and upload the SmartTAP Teams App
You’ll need to get a copy of the ST Teams App from your AudioCodes rep before you can complete this step.
As the App manifest has to be edited so that the App knows what ST instance to point to, it needs to be uploaded as a custom app into your tenant before it can be sideloaded into your Teams client.
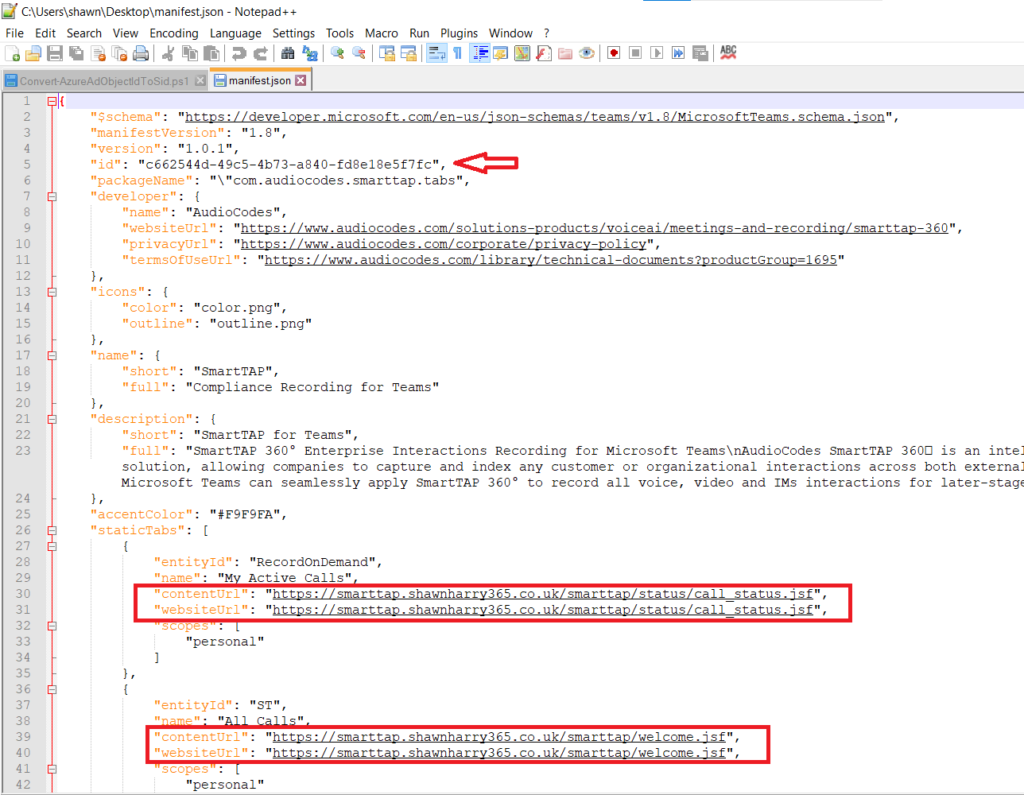
Edit the Manifest JSON file contentUrl & websiteUrl for each of the below replacing these with your FQDN. Make sure you do not delete the commas otherwise you may experience failure when uploading the app in the Teams Admin Centre.
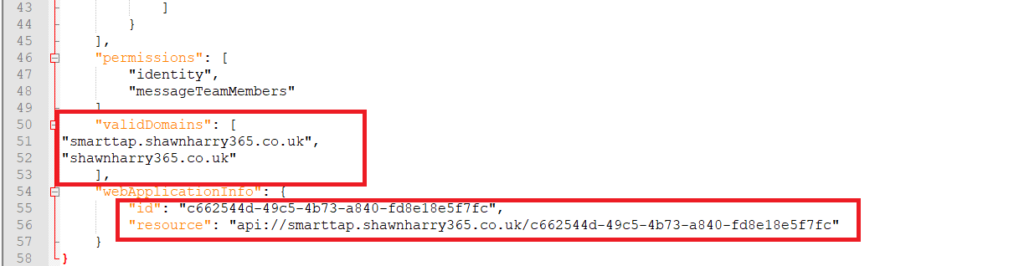
Lastly ensure the ID and resource match the Client ID of your app registration and the API String is the string you recorded earlier when updating your App Registration.
Note: I’m not sure the ID at the beginning of the Manifest even matters. But there’s no harm changing this from the default to your app registration client ID. The same is true for the validDomains. I’m not sure this matters but i entered my domains anyway. Ultitmately the app is only going to browse to the contentUrl or websiteUrl when a users selects either the “My Active Calls” or “All Calls” tab in the app anyway, hence why you need to ensure these URLs are A) correct and B) accessible over the Internet.
Add the manifest and the two image files to a .zip archive and upload the package to Teams.
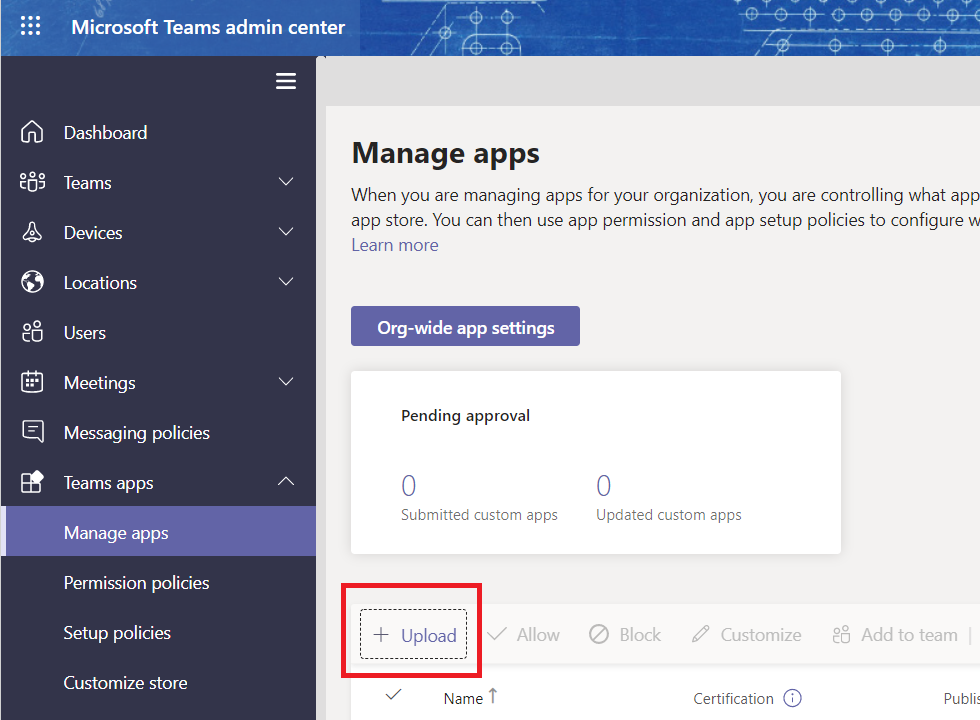
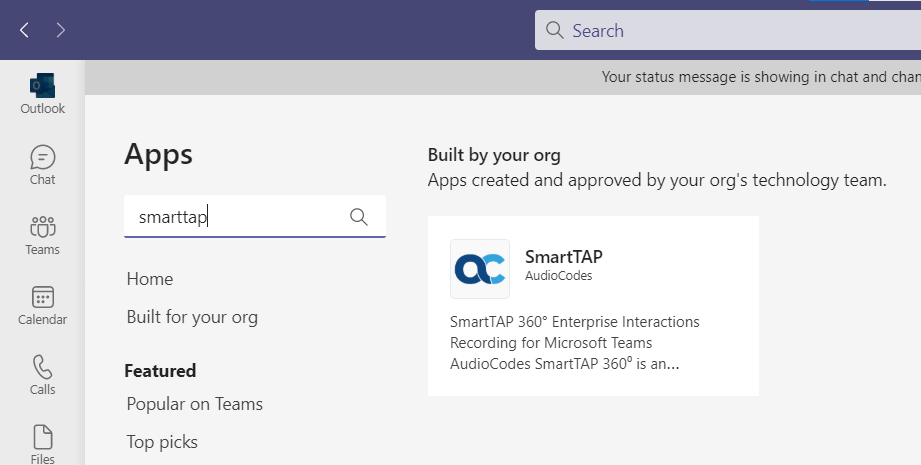
You should then be able to add the ST App as an App in Teams now from your Company App store.
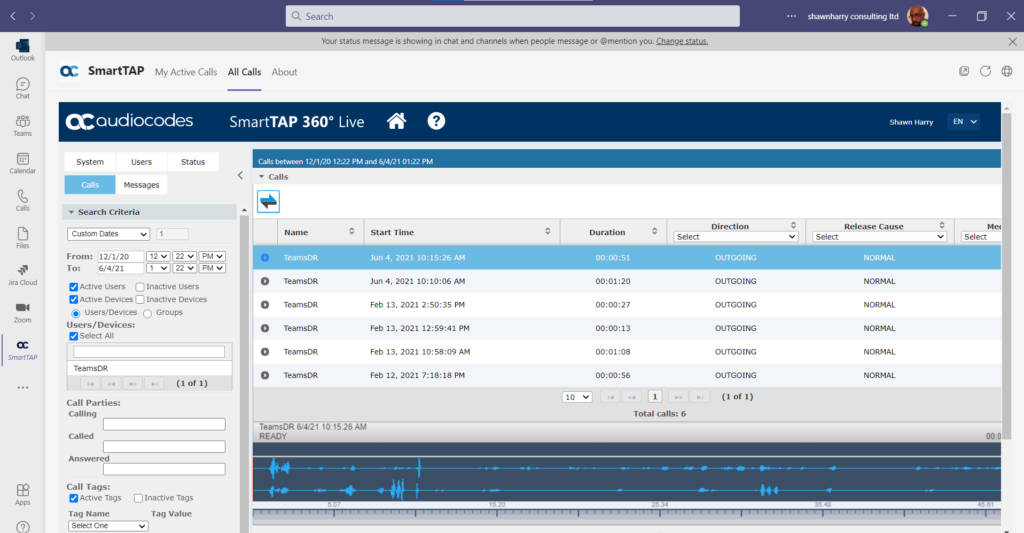
Click on the newly installed app and assuming you’re licensed as a user or admin you’ll be automatically signed in via SSO and you should see the ST web UI. In my case I’m an administrator too so I can view, manage and play back recorded calls and administer the ST directly from my Teams client. Awesome right!!
No Comments