24 Mar Configuring Azure AD SSO for Crestron XiO
Crestron XiO allows you to use an external domain to Single Sign On (SSO) to the XiO portal. In a production environment its preferable to use your own domain and thus identity’s for logging into XiO rather than the default Crestron.io domain. The Crestron.io domain is managed by Crestron. Therefore they manage all of the identity controls too. This is fine for a Proof of Concept but in Production its usually peferable to have control over your own identitys.
When using your own domain whatever identity controls are configured, EG password-less authentication, MFA, Conditional Access and so on would also be applied to administrators logging into the XiO portal as these identity’s are controlled by your organisation. This ensures organizational compliance and the best security for the identity’s of administrators who’ve been granted access to manage devices in XiO who are now subject to your organisations identity governance.
This blog post will cover the steps for configuring AzureAD SSO with the Crestron XiO portal.
Prerequisites
- Azure AD Subscription
- Crestron XiO Subscription
You will need an AzureAD and a working Crestron XiO subscription first before you can configure the following steps.
One word of caution. @Graham_Walsh a good friend of mine authored this blog post a few years ago https://www.graham-walsh.com/crestron-xio-cloud-and-your-own-sign-in/ . Unfortunately these steps are now invalid and Crestron uses a slightly different approach to enable SSO integration into AzureAD hence the point of this blog post!
Step 1 – Configure Enterprise App Registration
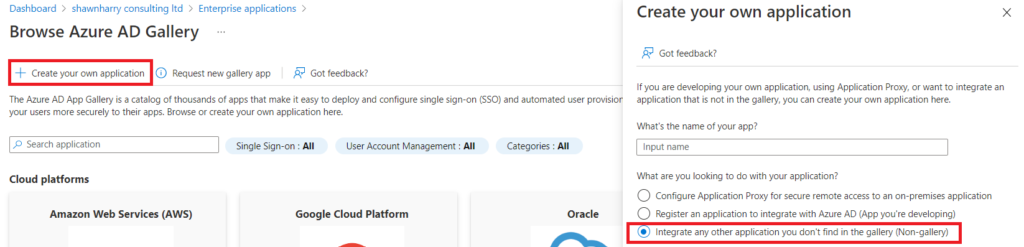
An Enterprise App registration is necessary to configure integration with XiO as Crestron require the App Federation Metadata URL from the app registration in order to configure the integration on their backend. So open Azure Active Directory > Enterprise Applications and select New Application. Now select Create Your Own Application and give the app a name. Ensure the Integrate any other application you dont find in the gallery (Non-gallery) is checked and click create to create the new Enterprise App registration:
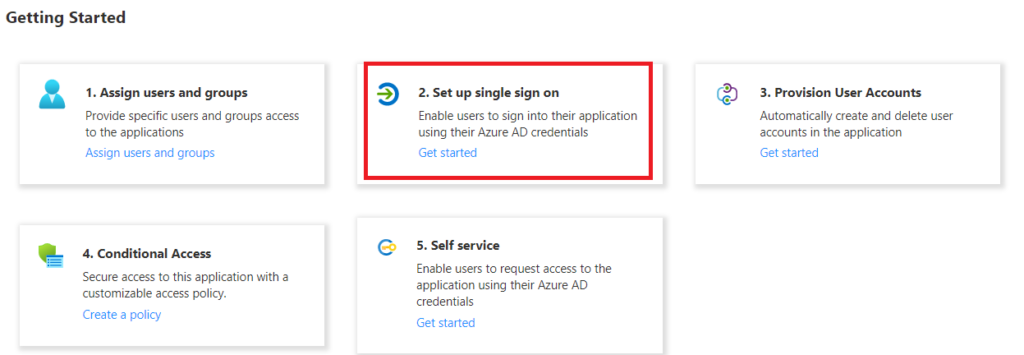
On the next screen select Set up Single Sign On:
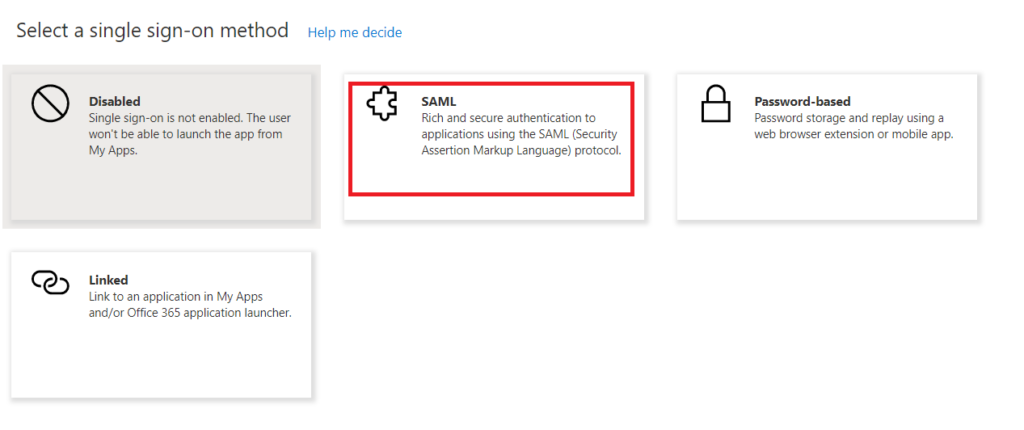
On the next screen select SAML:
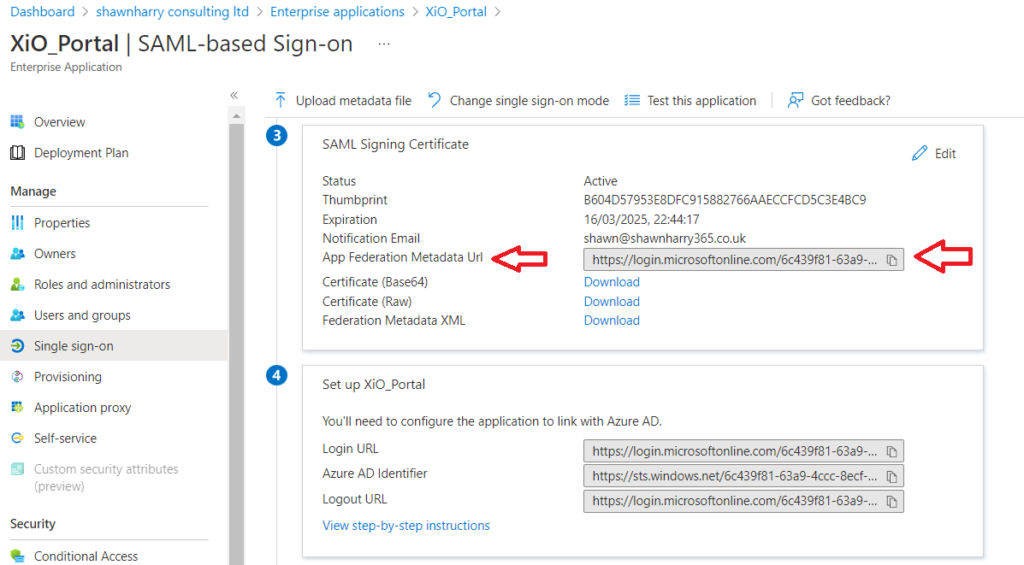
Before we configure the SAML-Based Sign-On page you need to copy the App Federation Medata URL as this information needs to be provided to Crestron via a webform.
Step 2 – Complete XiO Cloud SSO request
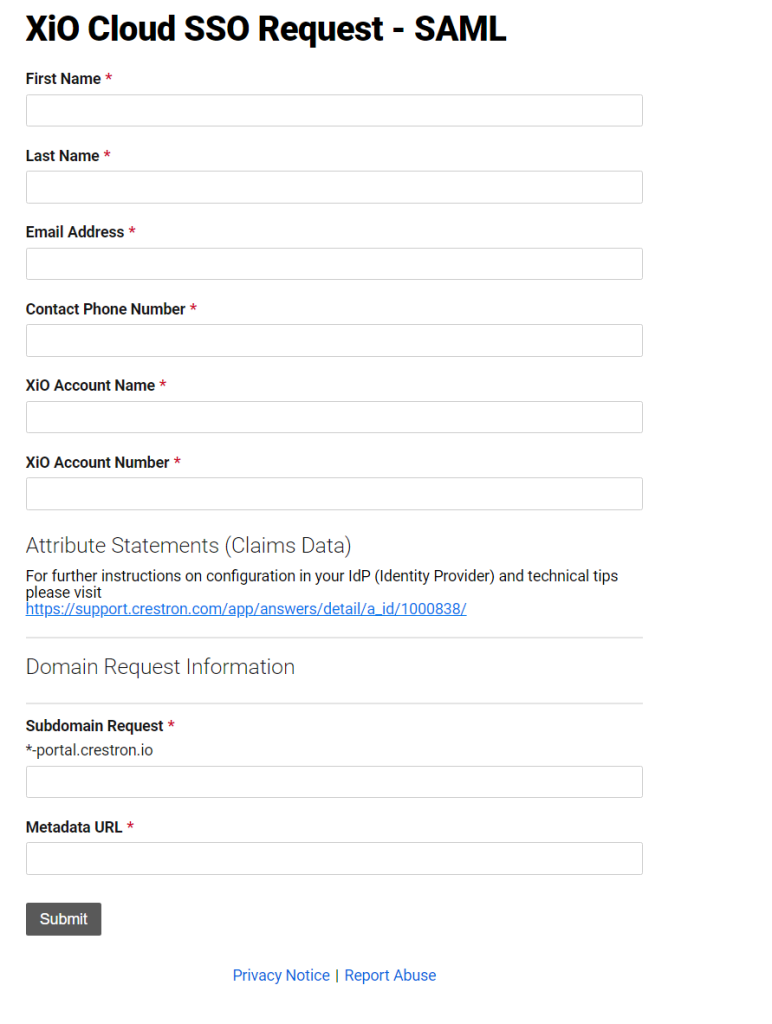
Browse to the following URL https://www.crestron.com/Support/Tools/Licensing-Registration/XiO-Cloud-SSO-Request. Completion of this form creates a ticket with Crestron who will configure the necessary steps on their end to create your SSO integration. This essentially creation of the new sub domain and an SSO entry on their backend that includes your App Federation Metadata URL.
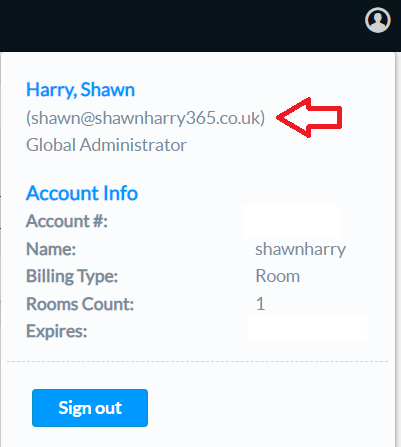
Your account name and number can be found in the top right hand corner on the XiO landing page when you initially login.
Choose a name for your subdomain. Make a note of this URL as you’ll need it later for when you login to XiO with your External Domain identity. EG YourDomainName-Portal.Crestron.io. It can take Crestron a few days to make the changes on the back end. Once its configured you’ll get a notification email to advise that the changes have been made and you can test logging in with your external domain.
Step 3 – Configure SAML Based Sign-On
You can now complete the SAML configuration. On Basic SAML Configuration click edit. On the Identifier (Entity ID) you need to enter the following URL:
https://xiocloudb2cprd.b2clogin.com/XioCloudB2CPrd.onmicrosoft.com/B2C_1A_PRD_TrustFrameworkBase
On the Reply URL (Assertion Consumer Service URL) you need to enter the following URL:
https://xiocloudb2cprd.b2clogin.com/XioCloudB2CPrd.onmicrosoft.com/B2C_1A_PRD_TrustFrameworkBase/samlp/sso/assertionconsumer
Click Save to save the configuration.

Click edit on Attributes and Claims and ensure you have the following claims configured per the screenshot below. You can either delete or edit the default claims that are already there but all the Additional Claims must be listed per the below. You do not need to edit the Required Claim.
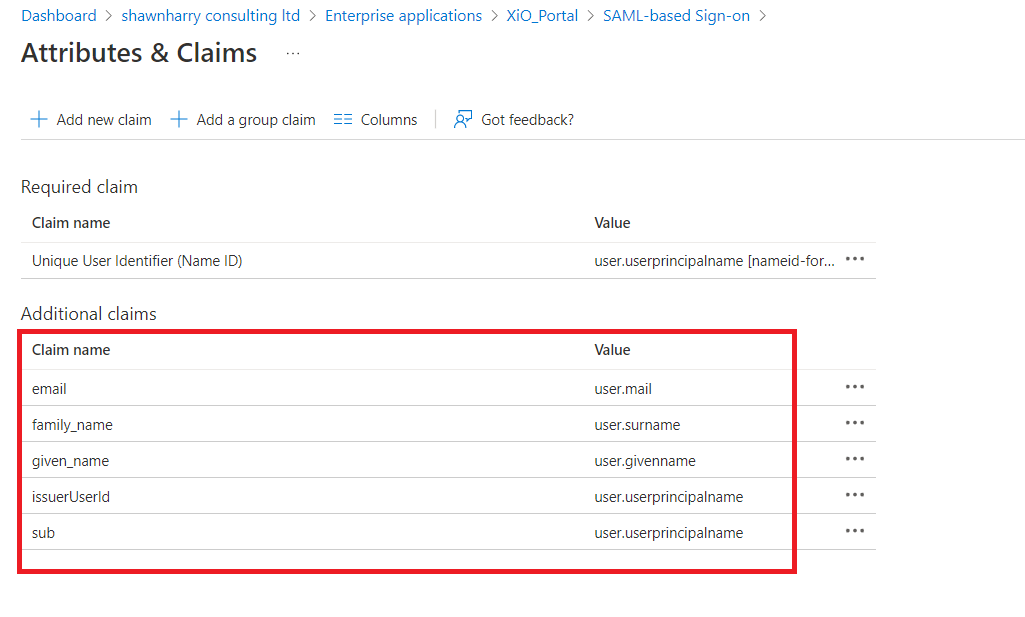
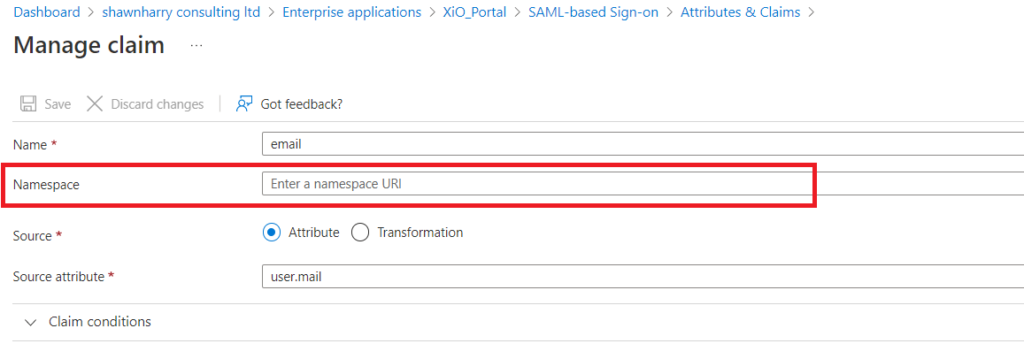
Ensure that the NameSpace for each claim is empty. If this is populated its possible authentication failure to XiO may result.
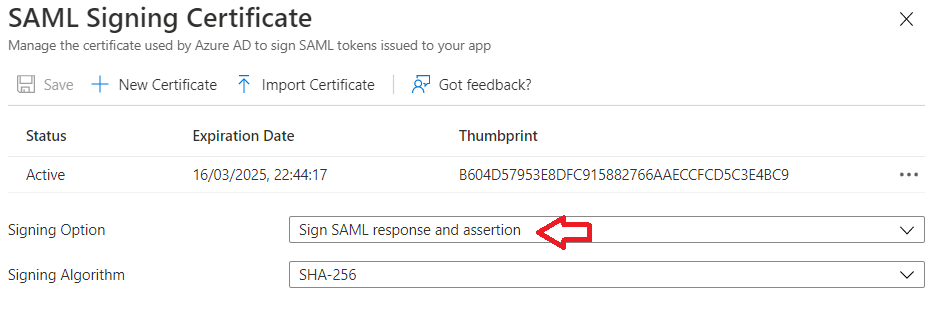
On the SAML Signing Certificate click edit and ensure the Signing Option is set to Sign SAML response and assertion. All other settings can be left at the defaults.
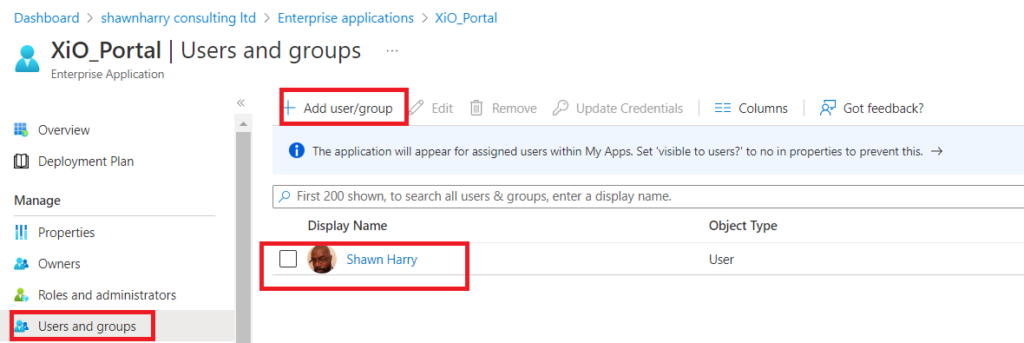
Lastly under User and Groups make sure the account(s) that you’ll be signing in with in XiO have been added. You can either add these explicitly or via a security group. If the accounts arent added authentication failure will result
Step 4 – Test SSO
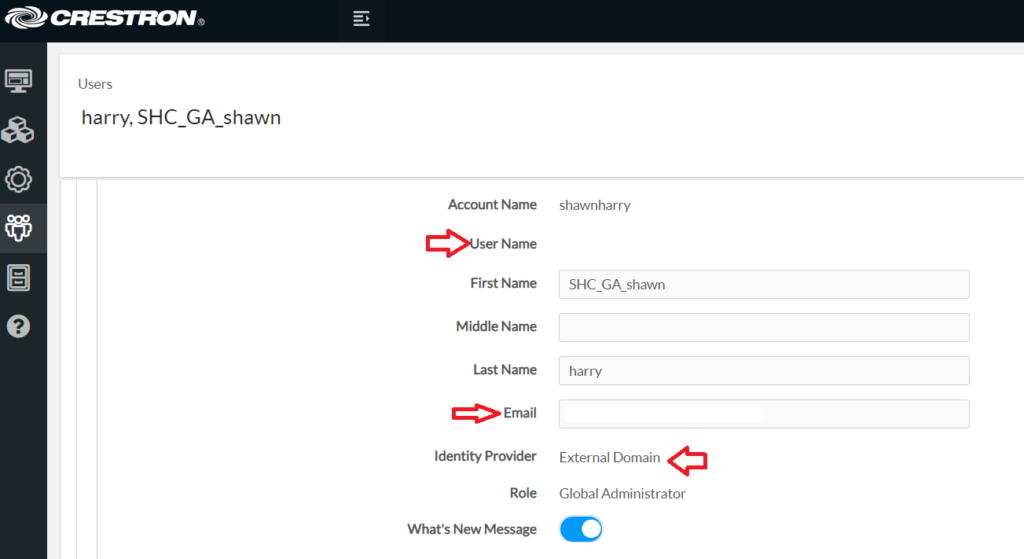
When Crestron have completed the changes their end you’ll now be ready to test. Note: Do not attempt to test using the Test Single sign-on in the Enterprise App registration as this will fail. You have to test using the sub-domain created earlier in Step 2. EG https://YourName-portal.crestron.io? Before you do this though ensure you have created an admin account already with your external domain.
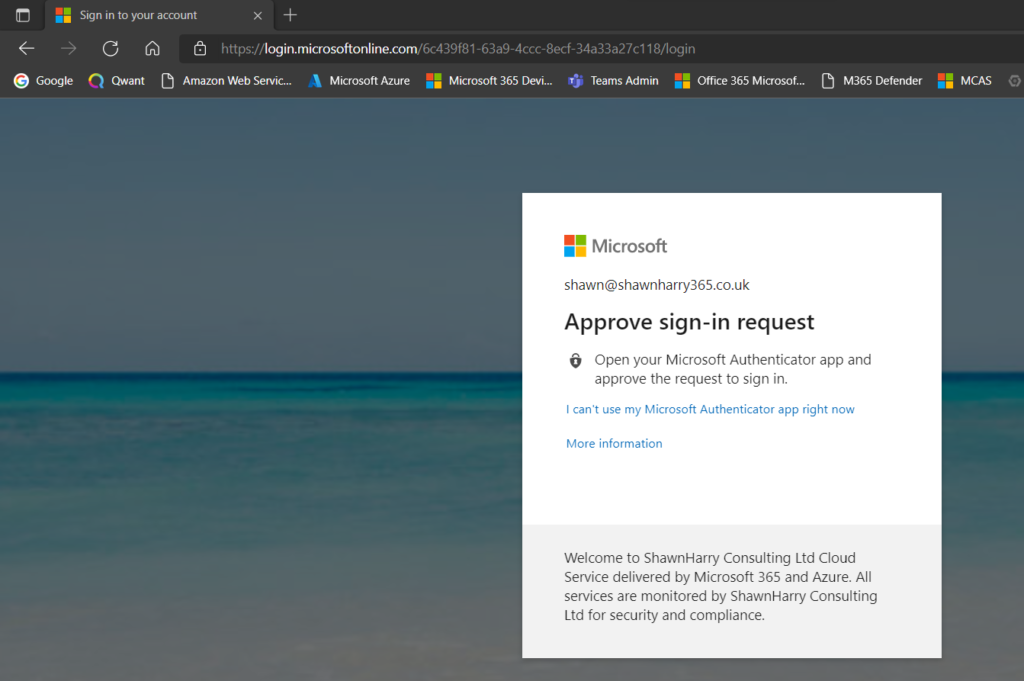
Now browse to your sub domain EG https://YourName-portal.crestron.io? and enter the email address (UPN) of the account of your external identity. As you can see from the screen shot below I’m using Microsoft Authenticator to auth so have been prompted to approve the sign in request on my phone.
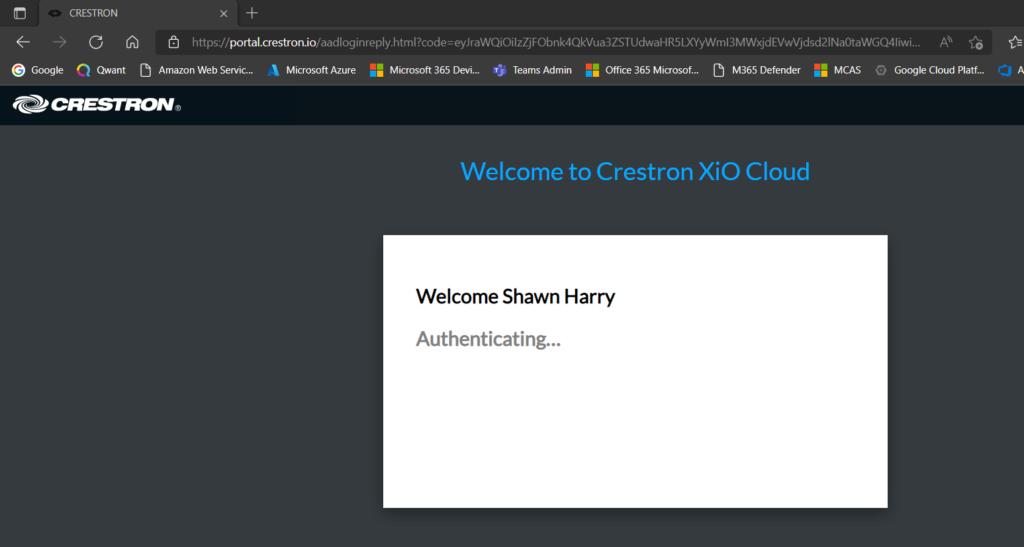
You can confirm you’re logged in with your external identity in the top right hand corner of of the XiO portal where you’ll see your login details
No Comments