02 Jun Microsoft Teams Media Optimisation for Windows Virtual Desktop
Introduction
I’ve personally been waiting in anticipation for some time for the release of Media Optimisation for Windows Virtual Desktop. For those that recall the history of the Citrix HDX and even its Remote Desktop equivalent on Lync Server 2013 Media Optimisation was designed to improve the user experience by ensuring media flows directly between the caller and callee rather than tromboning up to the virtual desktop in the datacentre. As you can imagine if the virtual desktop is hosted in a different geography to the user this could lead to a poor user experience if the media path for an Audio or Video call has to travel a long distance.
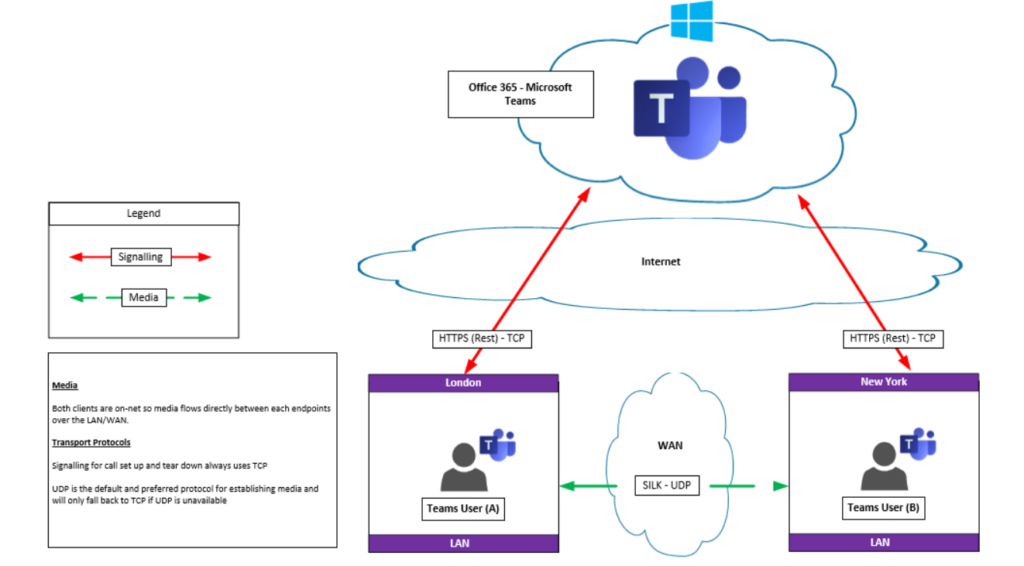
The diagram above shows the default media path for a point to point call. Irrespective of whether both users are in the same office or even different locations the Interactive Connectivity Establishment (ICE) protocol will always attempt to choose the shortest and most direct path to send media. Thus if you’re using Citrix, VMware or Azure Windows Virtual Desktop VDI’s and you’re planning to enable Microsoft Teams Audio and Video, then you really want to ensure media is optimised for your users so they can experience the best call quality. This is particularly important for users who are On-Net as if media is allowed to remain un-optimised then your internet egress will be used instead which could lead to more bandwidth utilisation than desired.
Architecture
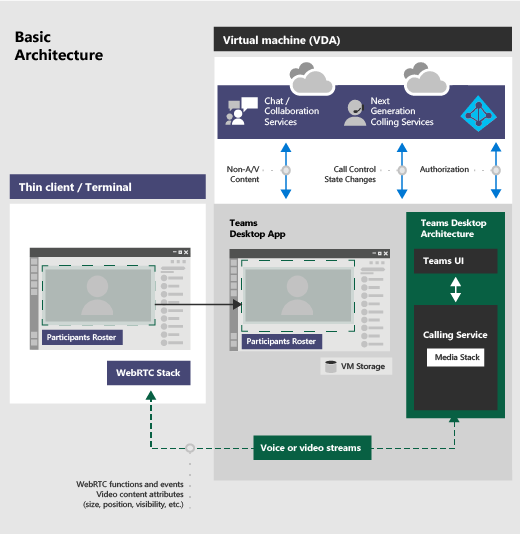
Teams takes a different approach to Media Optimisation compared to its Lync and Skype for Business predecessors. Lync and SfB required the installation of plugins on the guest VM as well as the PC terminal, effectively a two client approach and media was offloaded locally from the guest VM to the underlying PC terminal. Teams leverages the WebRTC protocol instead for call setup and tear down by redirecting the media stream to the underlying PC terminal which can then communicate directly with the callee. No client side plugins are required on the PC terminal that the Teams App or WVD is being streamed to.
Prerequisites
This blog posts assumes you have the following already in place:
- A configured and working WVD Instance with multi-session virtual machines
- Licensed Microsoft Teams and Windows 10 Enterprise E3/E5 users to test with
- A Windows 10 desktop to test from with the latest Remote Desktop for WVD client
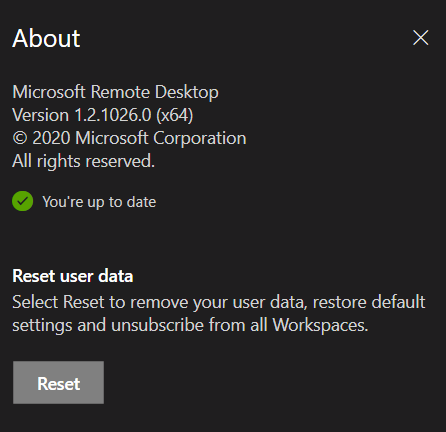
As Media Optimisation is still in preview it is only available today from a Windows 10 PC. Therefore the Remote Desktop client must be running on the latest build 1.2.1026.0. This can be downloaded here.
Installation
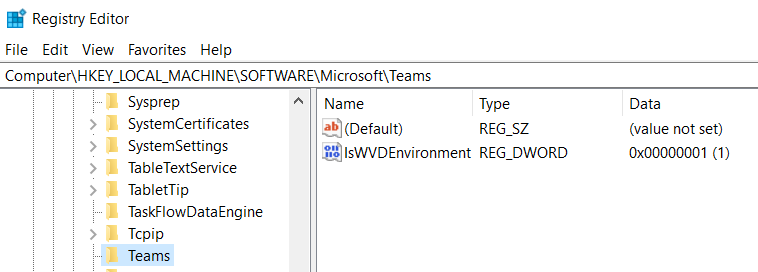
The following registry key must be created first before the latest Microsoft Teams desktop client can be installed. If this key is not created first the Teams Machine Wide installer will fail as it does a check to ensure the VM its being installed on is part of a WVD environment. This key will not exist in the registry so the key can be created manually using the .reg script below.
Windows Registry Editor Version 5.00
[HKEY_LOCAL_MACHINE\SOFTWARE\Microsoft\Teams]
“IsWVDEnvironment”=dword:00000001
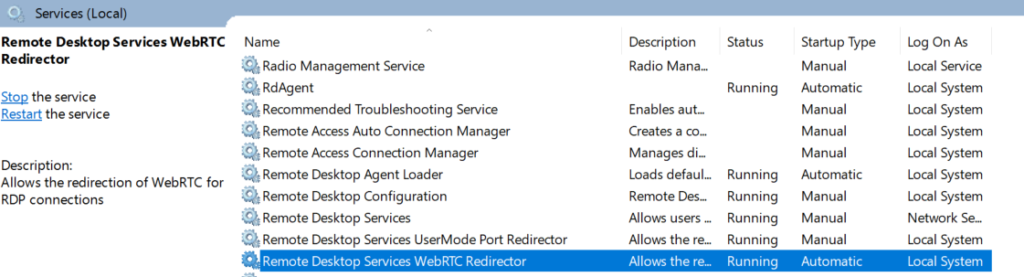
Next the websocket service must be installed. This allows allows the redirection of WebRTC for Remote Desktop connections. This can be downloaded here. If the installation fails with any error ensure the latest version of the Visual C++ Redistributable is installed then try again. The websocket service when installed will attempt to start the Remote Desktop Services WebRTC Redirector service. If the installer completes successfully the service should show as ‘running’.
The Teams Desktop Client can be installed now. Its important to use the Teams .msi client for this as this client has been optimised for use on VDI environments. As my WVDs are persistent im using the machine wide option to install the Teams client.
From Powershell run the following including the file path of where you saved the installer. This will install the latest build 1.3.00.4461:
msiexec /i c:\file_path\Teams_windows_x64 /l*v c:\file_path\Install_Logfile.txt ALLUSER=1
Note: For Teams AV optimization in VDI environments to work properly, the thin client endpoint must have access to the internet. If internet access isn’t available at the thin client endpoint, optimisation startup won’t be successful. This means that the user is in a non-optimized media state.
Verifying Media Optimisation
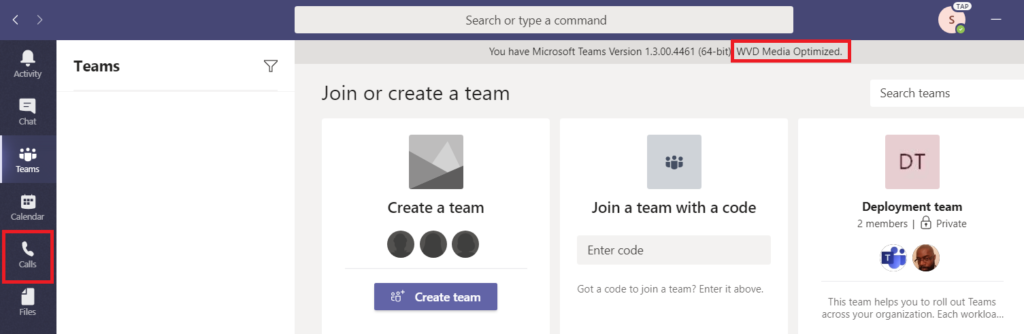
To validate the Teams client is media optimised there’s a few visual ways you can do this. Firstly if the client is optimised it will show the Calling App in the left rail. If the calling app isn’t available then the client is not optimised. Secondly if you select your profile image > About > Version the banner will show the build number and also WVD Media Optimised.
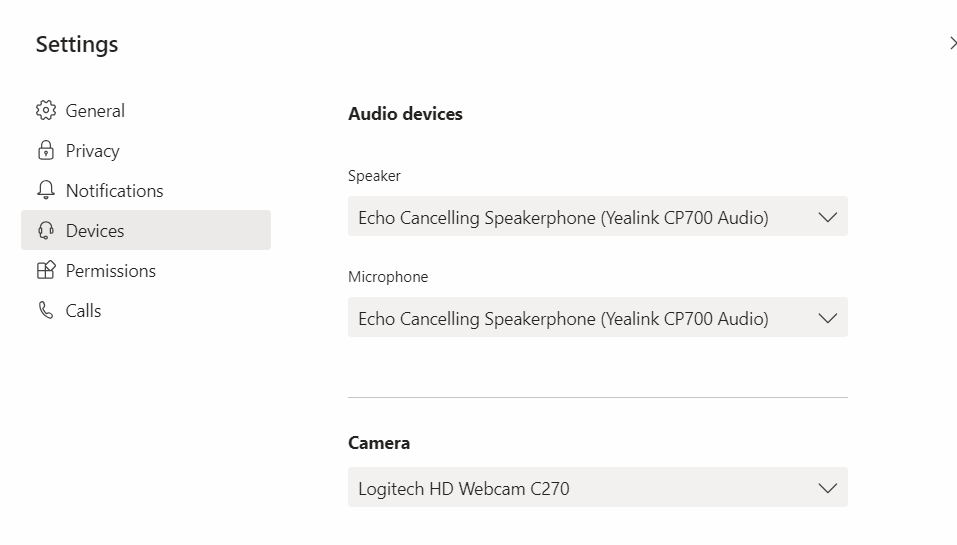
Lastly when in optimised mode from Settings > Devices you will see the available re-directed webcam and microphones that are available. When the client is optimised no devices will show in the drop down and the banner will show ‘Not optimised’.
Testing
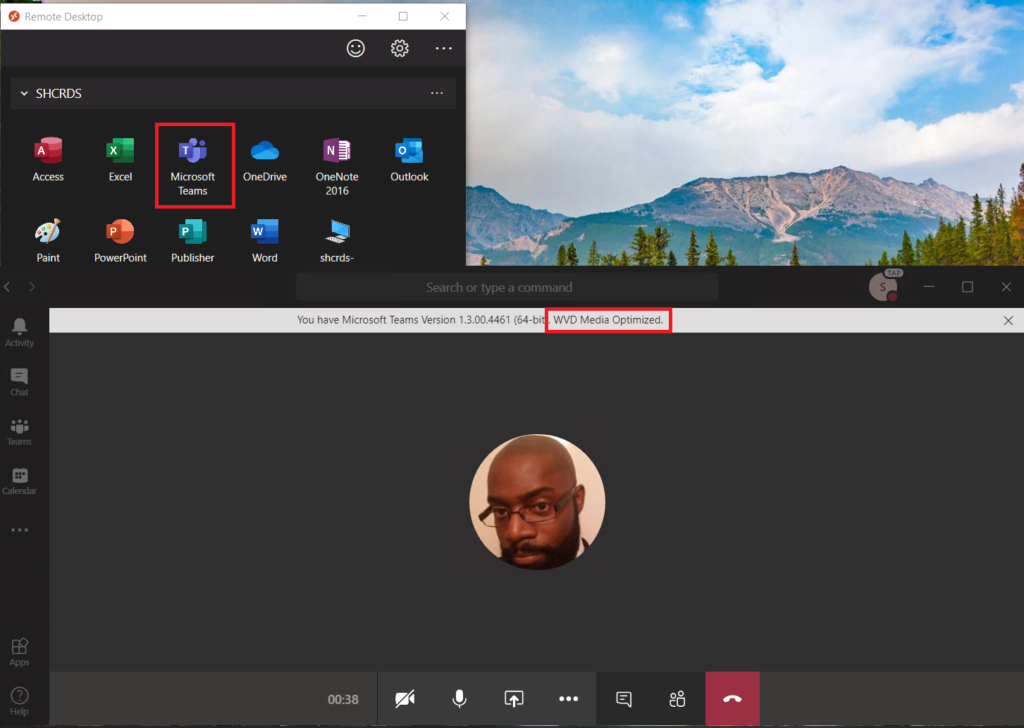
In my environment I’ve installed Teams as a published application as well. So i’m able to test calls from Teams as a published app as well as directly from a WVD.
After making an audio call between two users on my LAN Call Analytics shows that a local and remote host candidates were selected for the call, meaning the audio was sent directly between the two LAN connected endpoints.
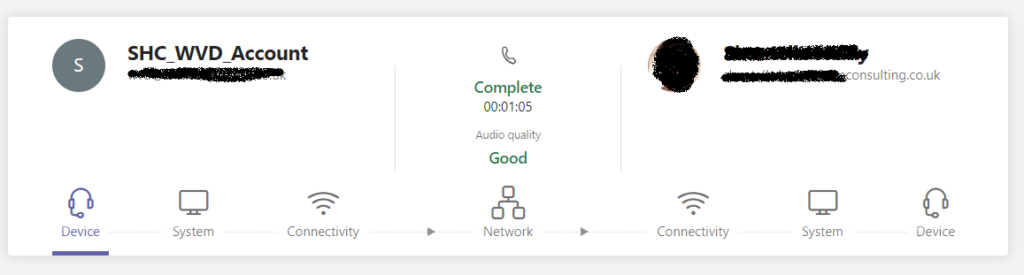

Unfortunately Call Analytics doesn’t show what codec was used for the call but i suspect it was likely OPUS Wideband as WebRTC doesn’t support SILK which is proprietary to Microsoft.
Current Limitations
There are a number of limitations in the preview covered below and here.
- With per-machine installation, Teams on VDI isn’t automatically updated the same way non-VDI Teams clients are. To update the client, you’ll need to update the VM image by installing a new MSI.
- Teams currently only shows the UTC time zone in chat, channels, and calendar.
- Media optimization for Teams is only supported for the Windows Desktop client on machines running Windows 10.
- Use of explicit HTTP proxies defined on an endpoint is not supported.
- The Teams desktop client in Windows Virtual Desktop environments doesn’t support live events. For now, we recommend you join live events from the Teams web client in your remote session instead.
- Minimising the Teams app during a call or meeting may result in the incoming video feed disappearing when you expand the app.
- Calls or meetings don’t currently support application sharing. Desktop sessions support desktop sharing.
- When desktop sharing in a multi-monitor setup, all monitors are shared.
- Give control and take control aren’t currently supported.
- Teams on Windows Virtual Desktop only supports one incoming video input at a time. This means that whenever someone tries to share their screen, their screen will appear instead of the meeting leader’s screen.
- Due to WebRTC limitations, incoming and outgoing video stream resolution is limited to 720p.
- The Teams app doesn’t support HID buttons or LED controls with other devices.