
09 Apr Using Audiocodes OVOC to troubleshoot Microsoft Teams Direct Routing calls
Overview
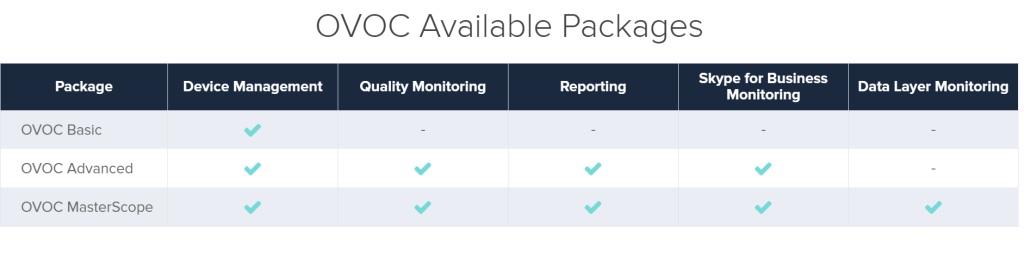
AudioCodes One Voice Operations Center (OVOC) is a voice network management solution that combines management of voice network devices and quality of experience monitoring into a single web-based application.
OVOC enables administrators to simplify lifecycle management of Audiocodes network elements such as Session Border Controllers, Analog Telephony Adaptors, IP Phones, Branch Routers and more by assisting in troubleshooting incouding detection and correction, performing root cause analysis, adding new devices to the VoIP network and initiating bulk software updates.
More importantly as Audiocodes is a vendor who supports Microsoft Teams Direct Routing OVOC can be used for troubleshooting and triaging Microsoft Teams PSTN calls that leverage Direct Routing!
Prerequisites
This post assumes you have a working OVOC installation and at least one Audiocodes SBC that is already configured for Direct Routing. Both OVOC and Audiocodes VE and CE edition can be installed in Azure from the Azure marketplace. I have installed both into Azure which simplifys the usual infrastructure deployment considerations.
In addition both OVOC and your SBC must have valid licenses.
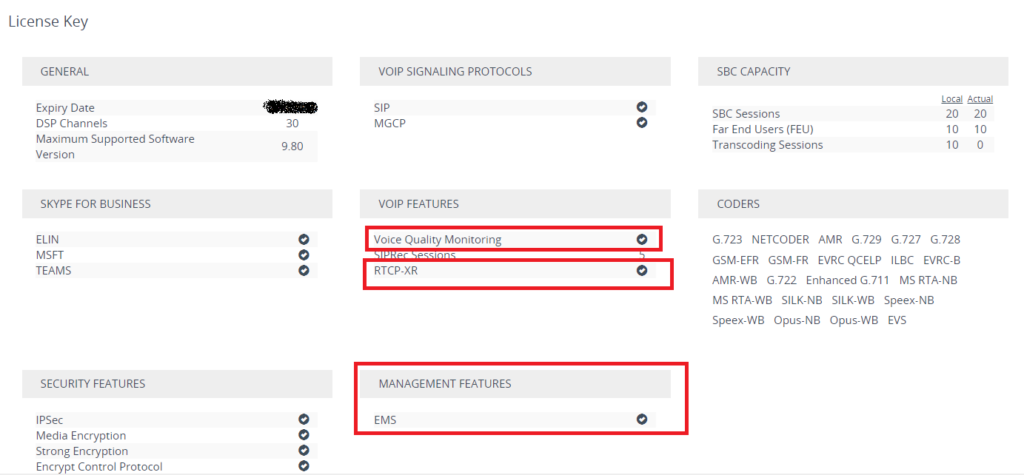
The SBC will require an EMS license and Voice Quality Monitoring at a minimum. RTCP-XR (Extensible Reporting) is optional.
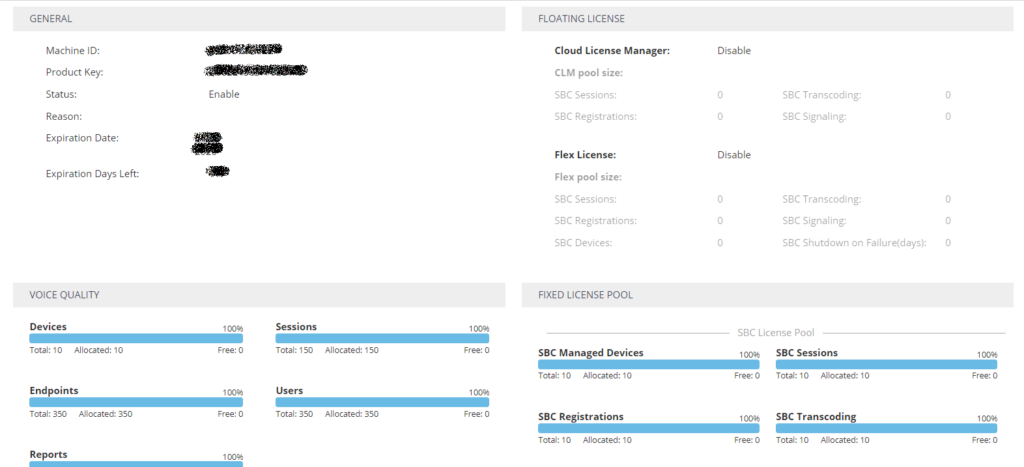
OVOC will need to have sessions licenses allocated for as many SBCs or devices that you need to manage.
Configuration
Step 1
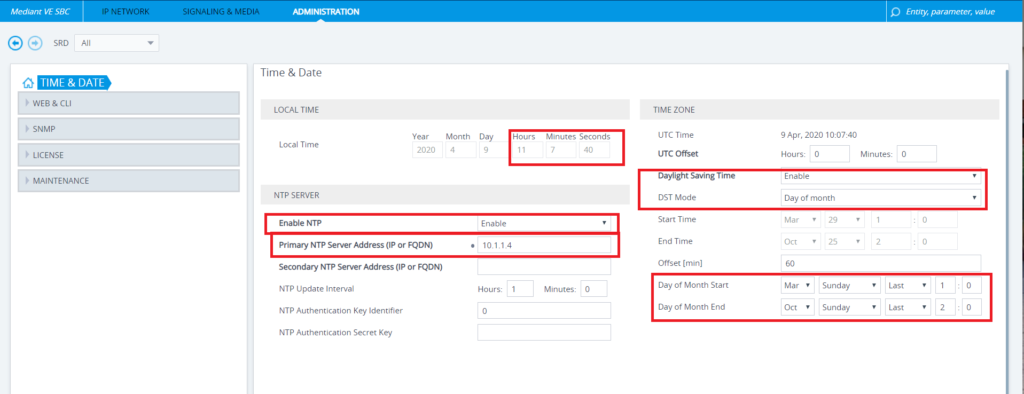
The most important step is ensuring the time on both OVOC and your SBC is in sync. If it is not the status of the SBC when added in OVOC could show in an error state. You can either allow each to sync from their own NTP or the SBC can be configured to take its time from OVOC as OVOC can act as an NTP Server.
I choose to use OVOC as the time server for my SBC.
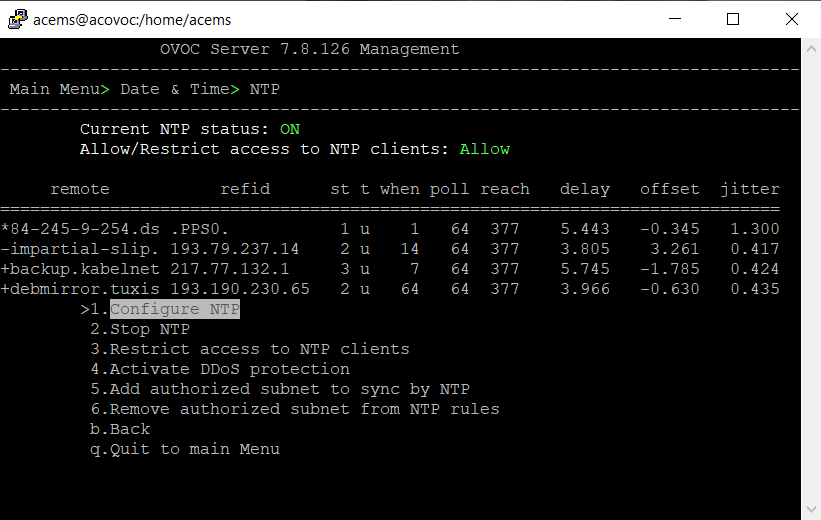
The NTP Server service appears to be on by default in OVOC. You can verify this by opening an SSH connection to OVOC.
- Login with the username acems and password acems
- Switch to root – su – root and the password root
- Type EmsServerManager
- Select Date & Time
- Then NTP
You should see the NTP status as on.
Step 2
If a Tenant & Region doesn’t exist already in your OVOC server you’ll need to create one.
- Click on Network then Topology
- Click on Add and select Tenant
- Enter a name and set Is Default to True.
- Modify the SNMP and HTTP tabs if necessary depending on your SBC configuration. Otherwise these can be left at their defaults.
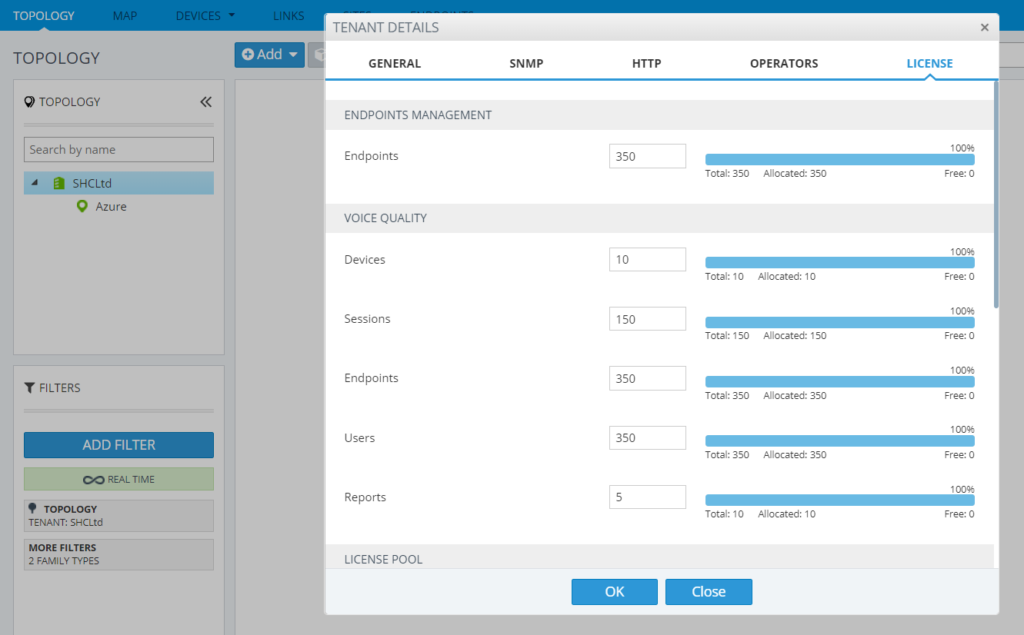
- On the License tab allocate enough licenses as required for monitoring devices and sessions. The number of available licenses will depend on the license you have purchased from Audiocodes.
- Click Add and Select Region
- Select the tenant and give the region a name
OVOC and the SBC communicate using HTTP(s) , SNMP and TCP (TLS). I installed OVOC and my SBC into the same subnet and broadcast domain. If OVOC or your SBC are firewalled off from each other then you’ll need to open the following ports bi-directionally:-
- HTTP(s) – 80/443/9400
- QoE – 5000/5001
- SNMP – 161/162 & 1161
Note:- Unless already changed on the SBC the default community strings Audiocodes uses are: Read – Public , Read-Write – Private, Trap – trapuser
Step 3
Add your SBC. Under Network/Devices/Manage click Add and select an AC Device.
- Enter a name
- Select the Tenant
- Select the region
- Enter the internal IP address of the SBC
- The SNMP tab can be left at the default
- Edit the HTTP tab if necessary with the appropriate username and password and click ok
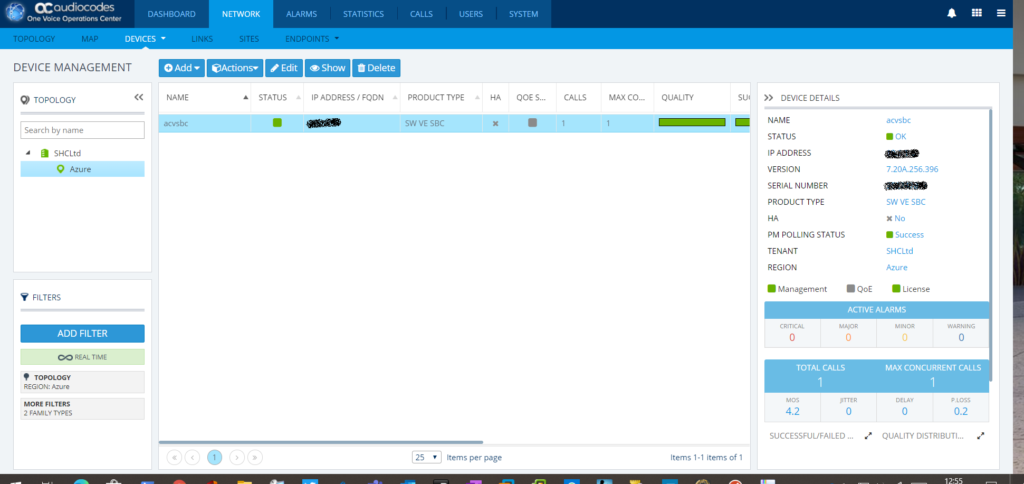
The status of the SBC should show as green. Select the SBC and then click Edit and the SBC’s information is displayed.
Step 4
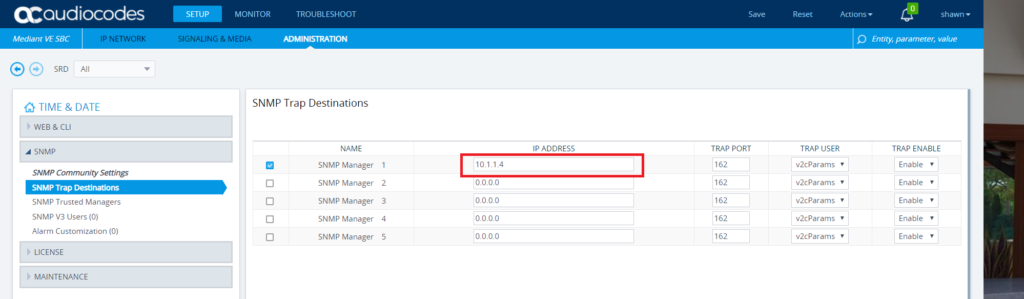
Login to your SBC and you should be able to see the OVOC added as an SNMP destination. You’ll need to save the running config if you haven’t done so already so the new setting is written to the flash memory.
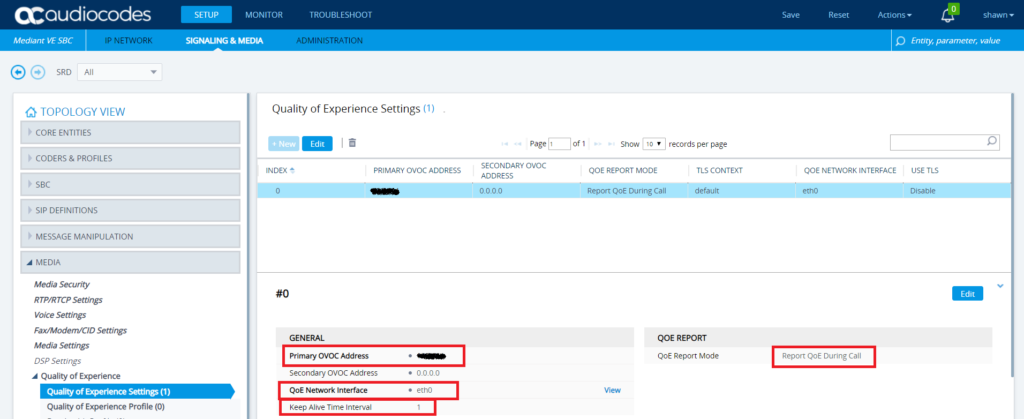
To enable the voice quality monitoring reports browse to Setup/Signalling & Media/Media/Quality of Experience/Quality of Experience Settings and add a new QoE.
- Enter the IP address of the OVOC as the Primary OVOC Address.
- The QoE Network Interface needs to be the interface used by the SBC to communicate with OVOC. In my case this is the default OAM interface.
- Keep Alive Timeout should be 1
- QoE Report Mode should be Report QoE During Call
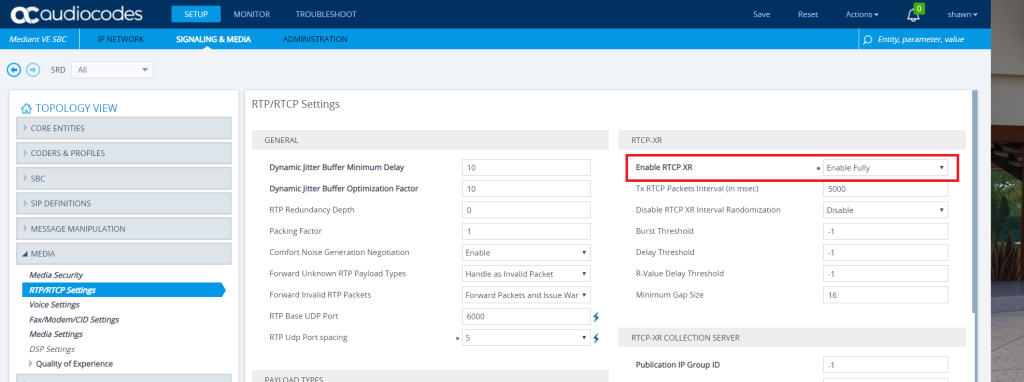
So that the SBC can send the enhanced voice quality reports to OVOC RTCP-XR must be enabled. This can be done via the RTP/RTCP Settings tab under Media and setting Enable RTCP-XR to Enable Fully.
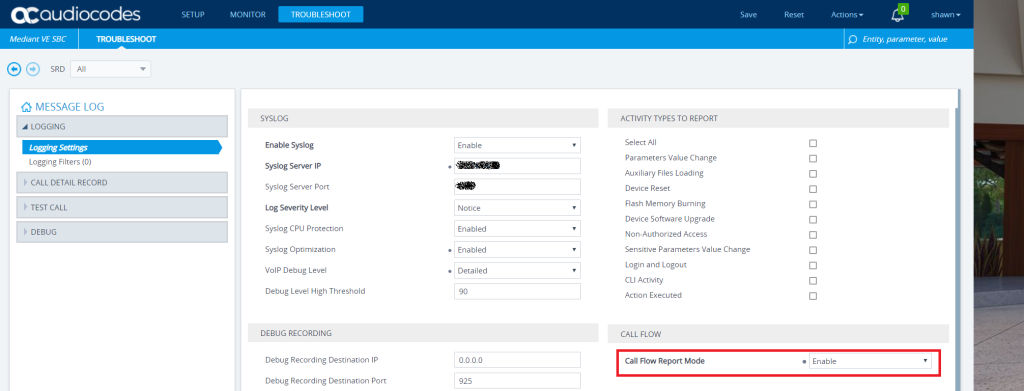
Finally so that the full call flow information is available to OVOC we need to enable the Call Flow Report Mode. Browse to Troubleshoot/Troubleshoot/logging/Logging Settings/Call Flow.
Now its time to make a test call from a DR enabled Teams client!
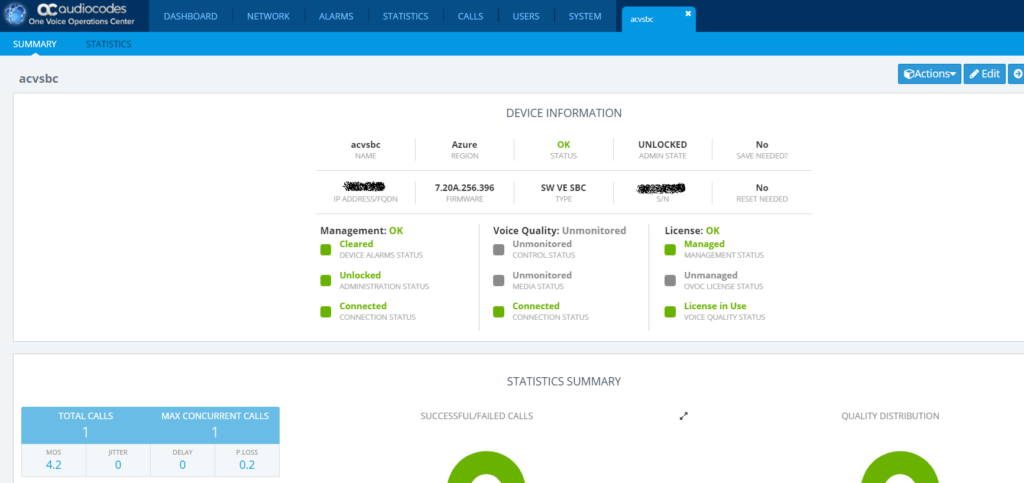
After you’ve placed your test call from OVOC browse to Network/Devices/Manage click on your SBC and then click Show. From the new tab that’s opened scroll to the bottom of the page select the call and then click Show. You’ll then see the details of your call.
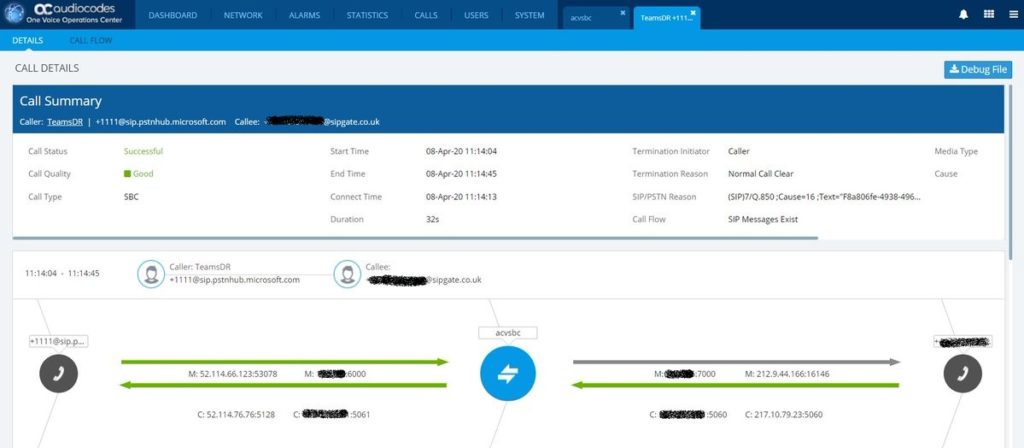
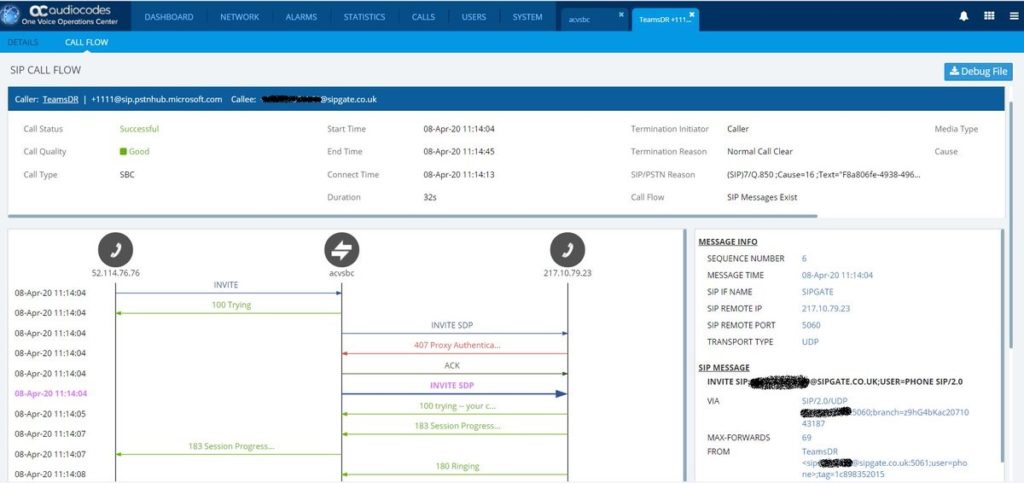
If you click on Call Flow you’ll see an even more awesome ladder diagram. You can click on any part of the call and the pane on the right hand side will drill down into the part of the SIP conversation selected and tons of verbose information is available to aid troubleshooting.
Note:- By default OVOC only saves poor quality or failed calls. So if like me you deallocate your VM’s to save cost don’t expect to see successful historical calls.
If you you have a large estate of SBC’s OVOC is a very powerful debugging tool for triage of PSTN calls. Administrators have one place to go to to troubleshoot rather than logging onto individual SBC’s and running syslogs.
The level of detail provided is far better than what the native Syslog Viewer can provide. There’s also an absolute wealth of information showing MOS scores, detailed signalling information, trends and much more. If you have Audiocodes SBC’s deployed and you’re not using OVOC yet you’re doing it wrong!