16 Nov Installing Audiocodes Cloud Edition in Azure
This blog post will only cover the core configuration necessary for installing Cloud Edition. I will not cover trunk configuration to Microsoft Teams or interop with any other platforms. Nor will this this post cover any other SBC features. This post assumes readers are familiar with Azure.
Introduction
Audiocodes Cloud Edition is the first Session Border Controller of its kind that supports a micro-service architecture that allows SBC compute resources to scale up and down on demand.
Rather than your traditional SBC which is usually a flat monolithic architecture and installed into a datacentre with a fixed amount of compute and DSP’s for transcoding calls, and usually sized based on call concurrency requirements plus additional headroom for growth, CE can operate at hyper-scale in Public Clouds such as Azure or AWS handling 10’s of thousands of calls to support carrier grade needs. In essence the core components of an SBC are abstracted away into a micro-service architecture that allows the SBC to scale according to demand.
It’s ability to scale up and down also brings benefits in terms of cost management, allowing compute resources to be used efficiently rather than idling during periods of low utilisation.
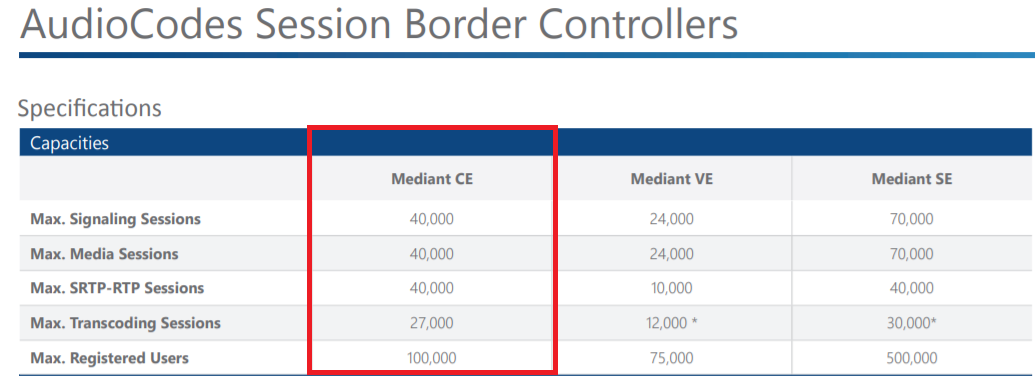
CE boasts some impressive capacity and is capable of supporting as many as 40,000 media streams.
It also supports the following important features that are important for life cycle management and deployment as well as high availability and business continuity.
- Cloud native full-function SBC platform
- Automatic and rapid scalability of SBC resources
- Deployment through native Amazon Web Services (AWS) tools such as CloudFormation
- Seamless integration with advanced automation and DevOps tools
- High-availability active/standby configuration with two-box redundancy, active calls preserved
Additional features of Cloud Edition can be found here:- https://www.audiocodes.com/media/13155/mediant-software-cloud-virtual-server-session-border-controller-sbc-datasheet.pdf
Note:– CE also comes in a basic edition that is limited to 500 sessions which can be used for small deployments that also require HA. Due to limitations of the Azure networking stack Virtual Edition cannot support HA in Azure.
Architecture
Cloud Edition is comprised of the following components:-
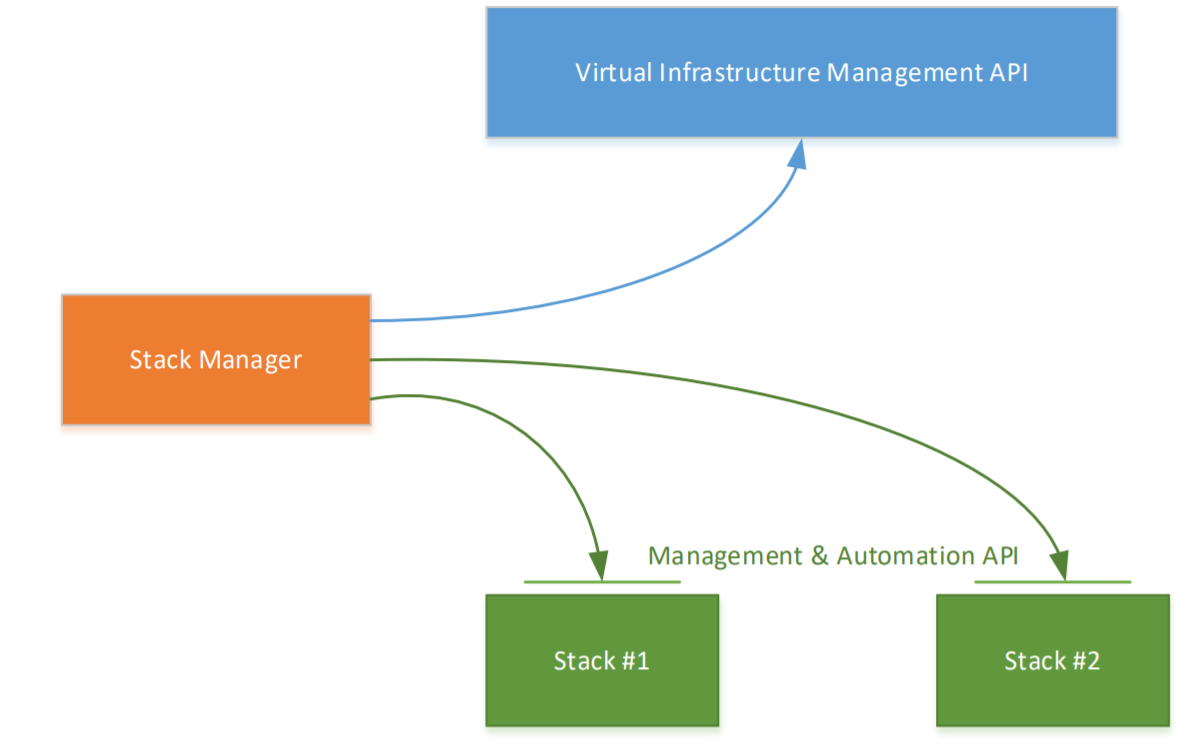
- Stack Manager – This is an API developed by Audiocodes that is used for managing the Cloud Edition components that are deployed into a Public Cloud or a Virtual Environment. It implements the complete lifestyle management of the CE components including deployment, termination, scale in/scale out and stack configuration updates. The Stack Manager also handles the network stack for the CE components facilitating features like mid call fail-over and maintenance of session state (HA) as well as communication with the Azure Virtualisation API which allows the Stack Manager to deploy additional Media and Signalling components or nodes.
- Signalling Component – This is responsible for call setup, tear down and call control, of calls traversing the SBC.
- Media Component – This provides media processing and media termination for calls traversing the SBC.
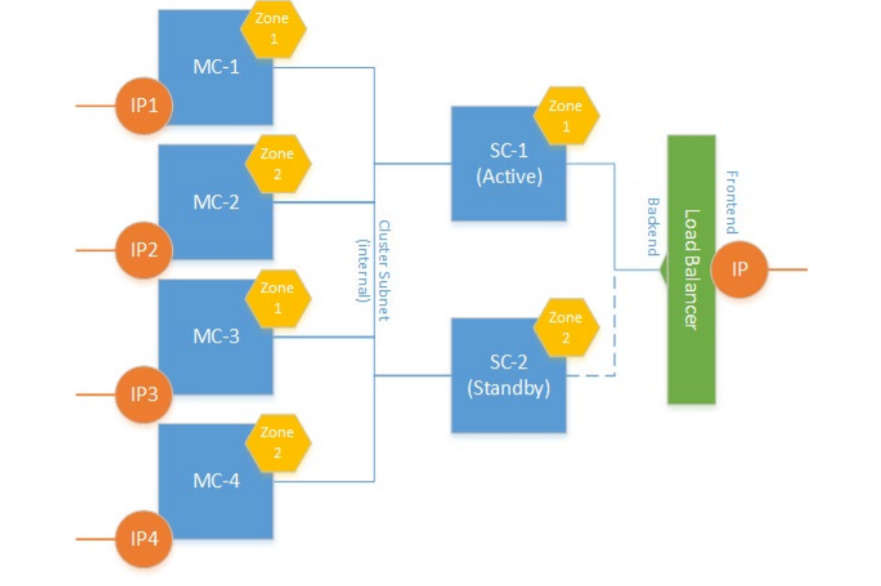
- Load Balancer – Communication across the active/standby signalling components is handled by Azure Load balancer facilitating failover to the standby SC in the event of an outage of the active SC.
CE components are deployed across two availability zones of the Azure region. Communication with signaling components must be performed through public IP addresses. Communication with media components may be performed through either public or private IP addresses.
Azure Load Balancer is used to steer inbound (signaling and management) traffic towards active signaling component. It also acts as a NAT gateway for outbound traffic from signaling components.
Communication with media components is performed through IP addresses (public or private) directly attached to them. Corresponding media traffic does not pass through the Load Balancer.
Each SC can handle up to 10,000 sessions. Each MC can handle up to 500 transcoded calls.
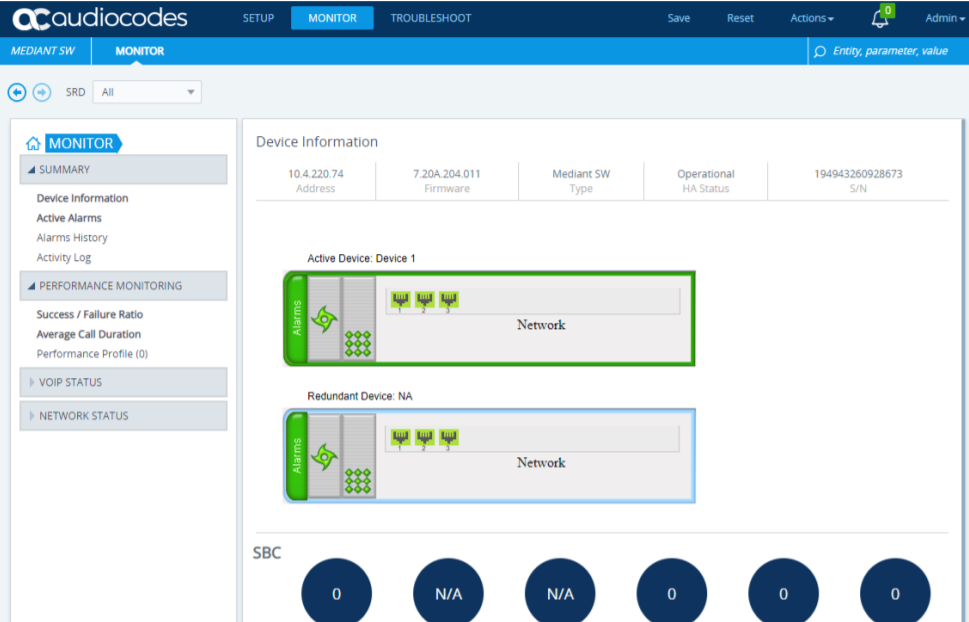
As CE runs the same firmware as other Mediant models, Virtual Edition, Software Edition, M1K, M4K etc configuration management of the SBC is the same. So admins can login to the active Signalling Component and be presented with the familiar Audicodes web UI.
Installation
Network Prerequisites
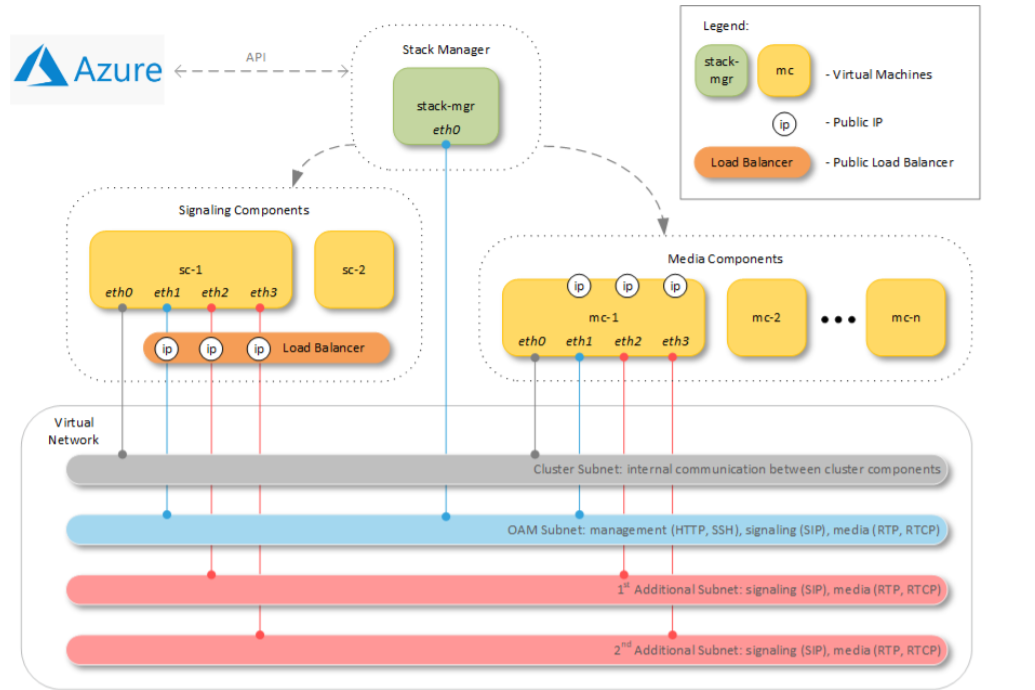
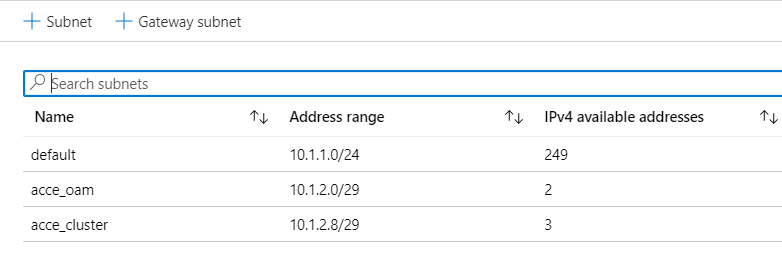
Up to four subnets can be used. A Cluster Subnet for internal communication between Mediant CE components, connected to both SC and MC instances as the first network interface (eth0).
An Operations Administration & Management (OAM) Subnet which carries management (HTTP, SSH, etc.), signalling (SIP) and media (RTP, RTCP) traffic, connected to both SC and MC instances as the second network interface (eth1) and to the Stack Manager instance.
1st and 2nd additional subnets can carry signalling (SIP) and media (RTP, RTCP) traffic, connected to MC instances as the third and fourth network interfaces (eth2 and eth3) correspondingly. These subnets are optional, as the OAM subnet may carry all types of traffic.
For simplicity i created two subnets OAM and Cluster within the same vNet.
Stack Manager Prerequisites
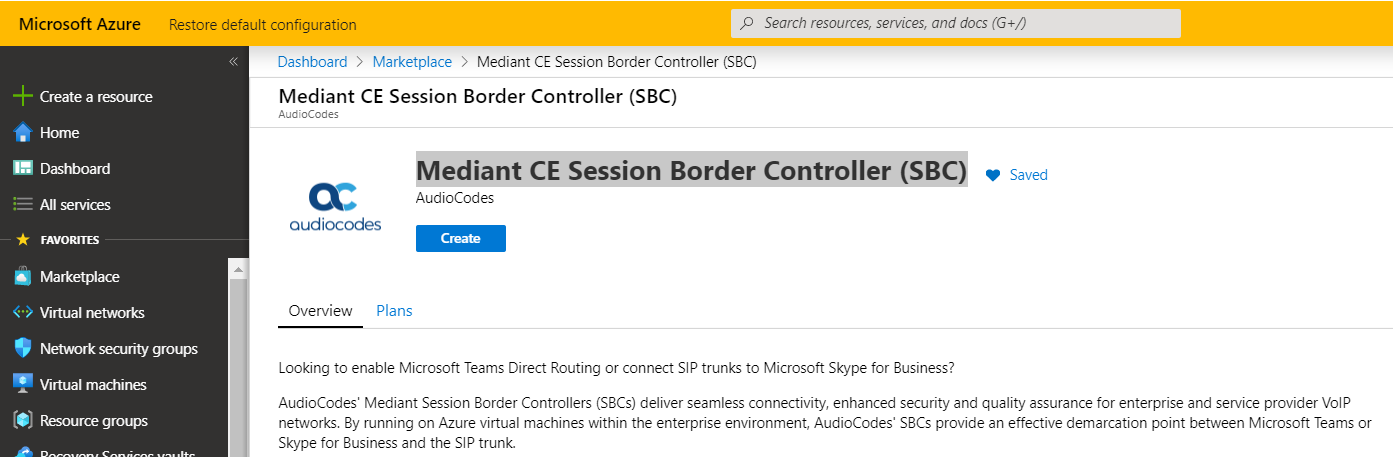
CE is available as an appliance in the Azure market place. The stack manager is the first component that must be deployed so the rest of the SBC micro-services can be deployed, SC, MC and so on. Installing the “Mediant CE Session Border Controller (SBC)” from the market place actually deploys a vanilla Stack Manager instance.
Note:- It is possible to install the Stack Manager on a number of Linux distro’s EG Ubuntu, CentOS etc and compile this manually but for ease of deployment i’ve chosen to use the appliance in the market place.
When the stack manager is deployed it needs to be configured to talk to the Azure Virtual Management API which allows it to deploy the necessary software stack SBC’s.
The steps for deploying the appliance are trivial so i will not cover them here. The Stack Manager is only a light weight appliance so the default Standard B1ms VM Size will suffice. Once the appliance is installed it needs to be configured to talk to the Azure tenant.
When deploying the Stack Manager ensure SM is deployed with a Public IP address. The SM uses this Public IP addresses when communicating with other CE stack instances that it deploys. Therefore, it may be deployed in any subnet. Nevertheless, to simplify the network topology, it is recommended to deploy SM into the same “OAM Subnet” used for carrying management traffic of deployed CE stack(s).
The Network Security Group (NSG) of the “OAM Subnet” and of the Stack Manager’s virtual machine must allow Stack Manager to communicate with both the Azure API and deployed CE stack instances using the HTTPS port 443. Ensure HTTP port 80 is also enabled inbound to the SM if configuring the SM remotely which allows for easier configuration of the SM configuration via the SM admin portal.
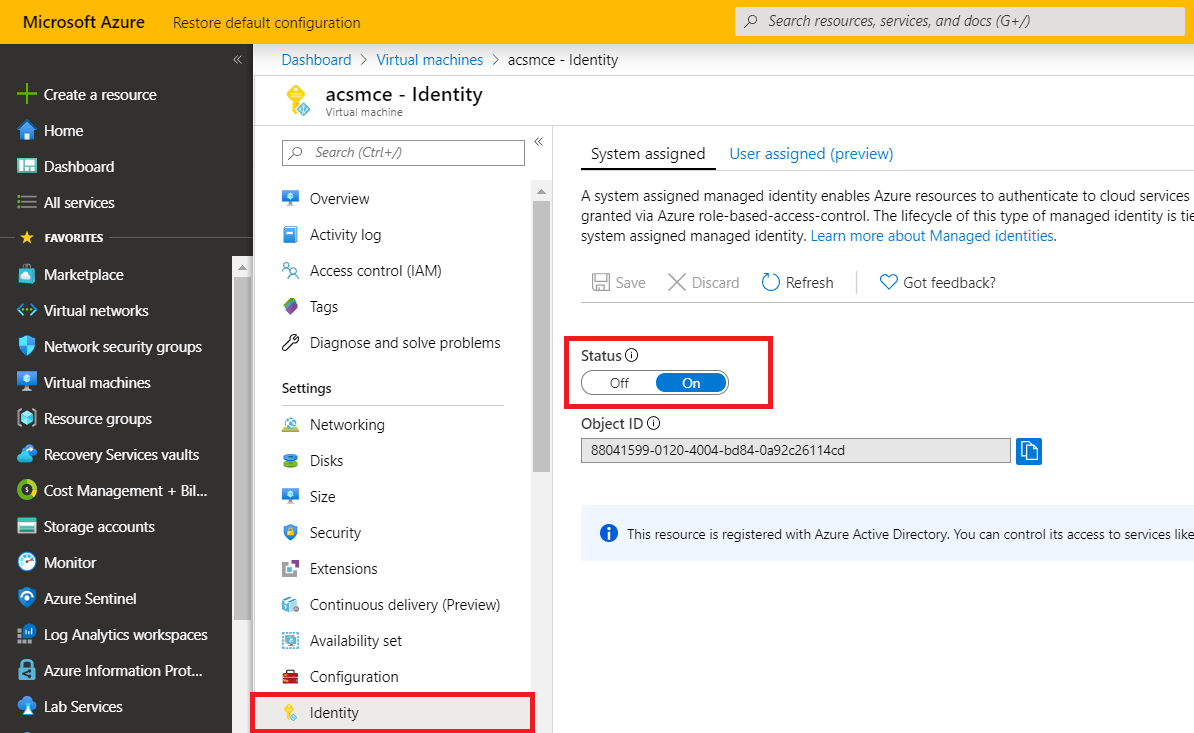
A managed service identity is necessary so the SM can talk to the Azure Virtualisation APIs for successful deployment and management of the SBC stack. Select the VM and ensure the MSI is set to on.
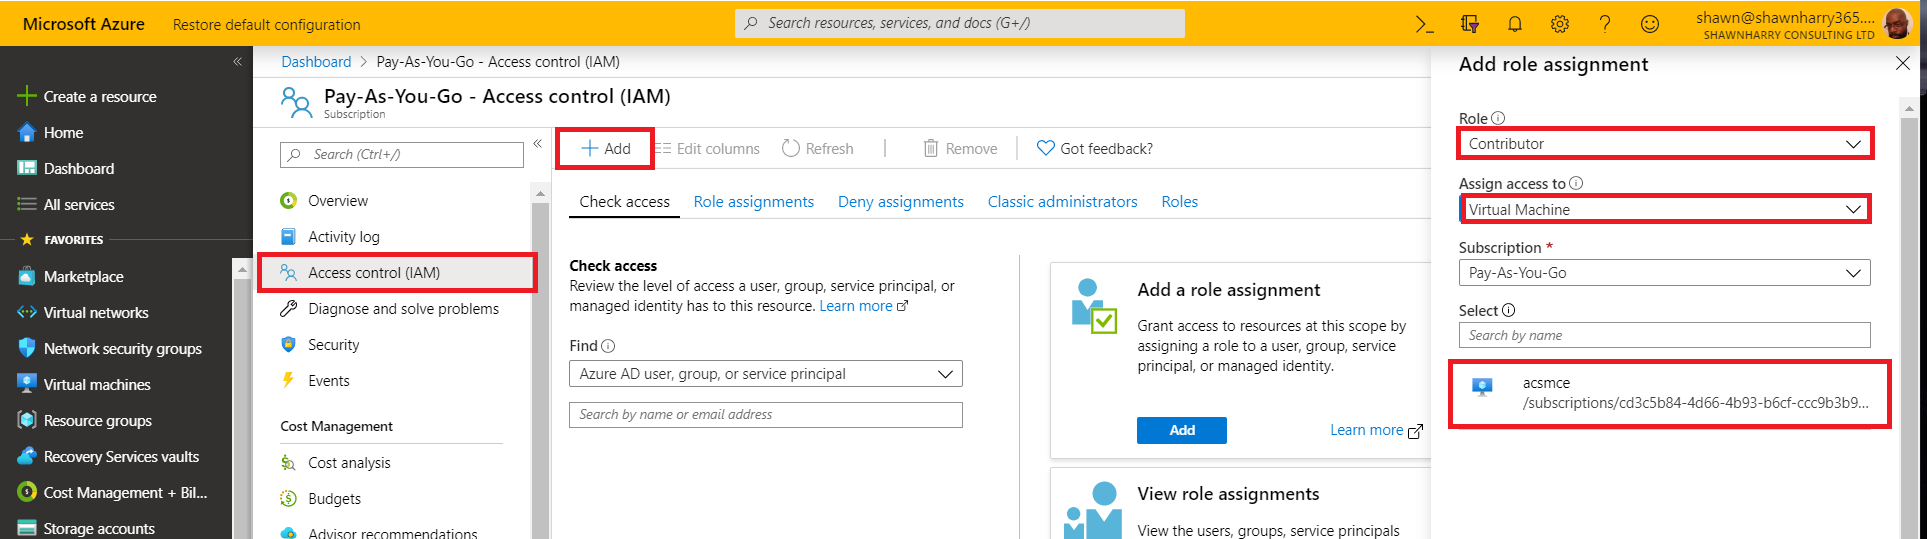
Select your subscription in the Azure portal and then grant the VM Contributer permissions. This step permissions the VM to access the Azure API’s.
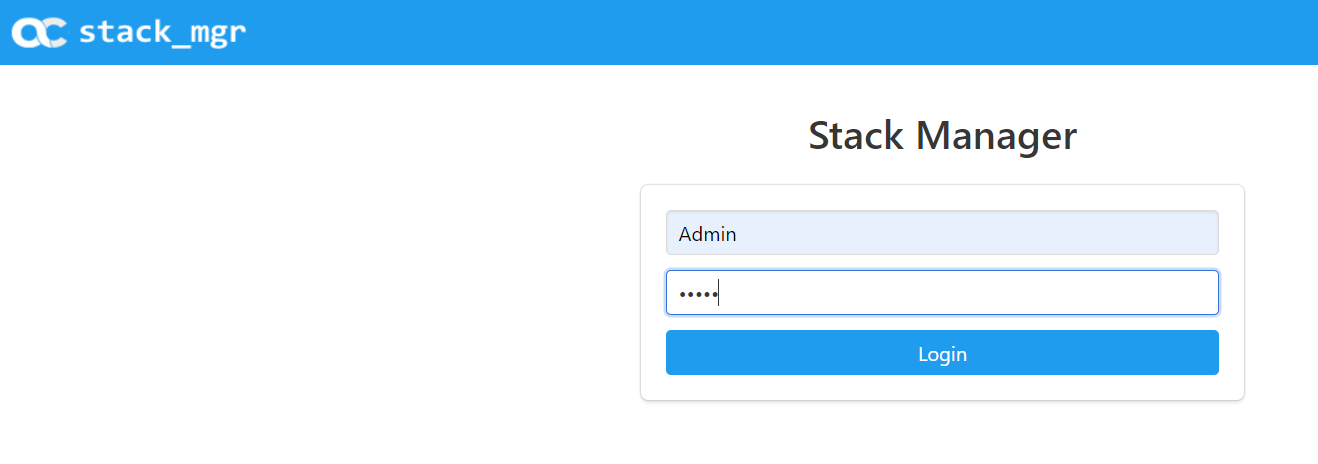
Browse to the public IP of the SM and you should see the following login screen. The default username & password is “Admin” “Admin”.
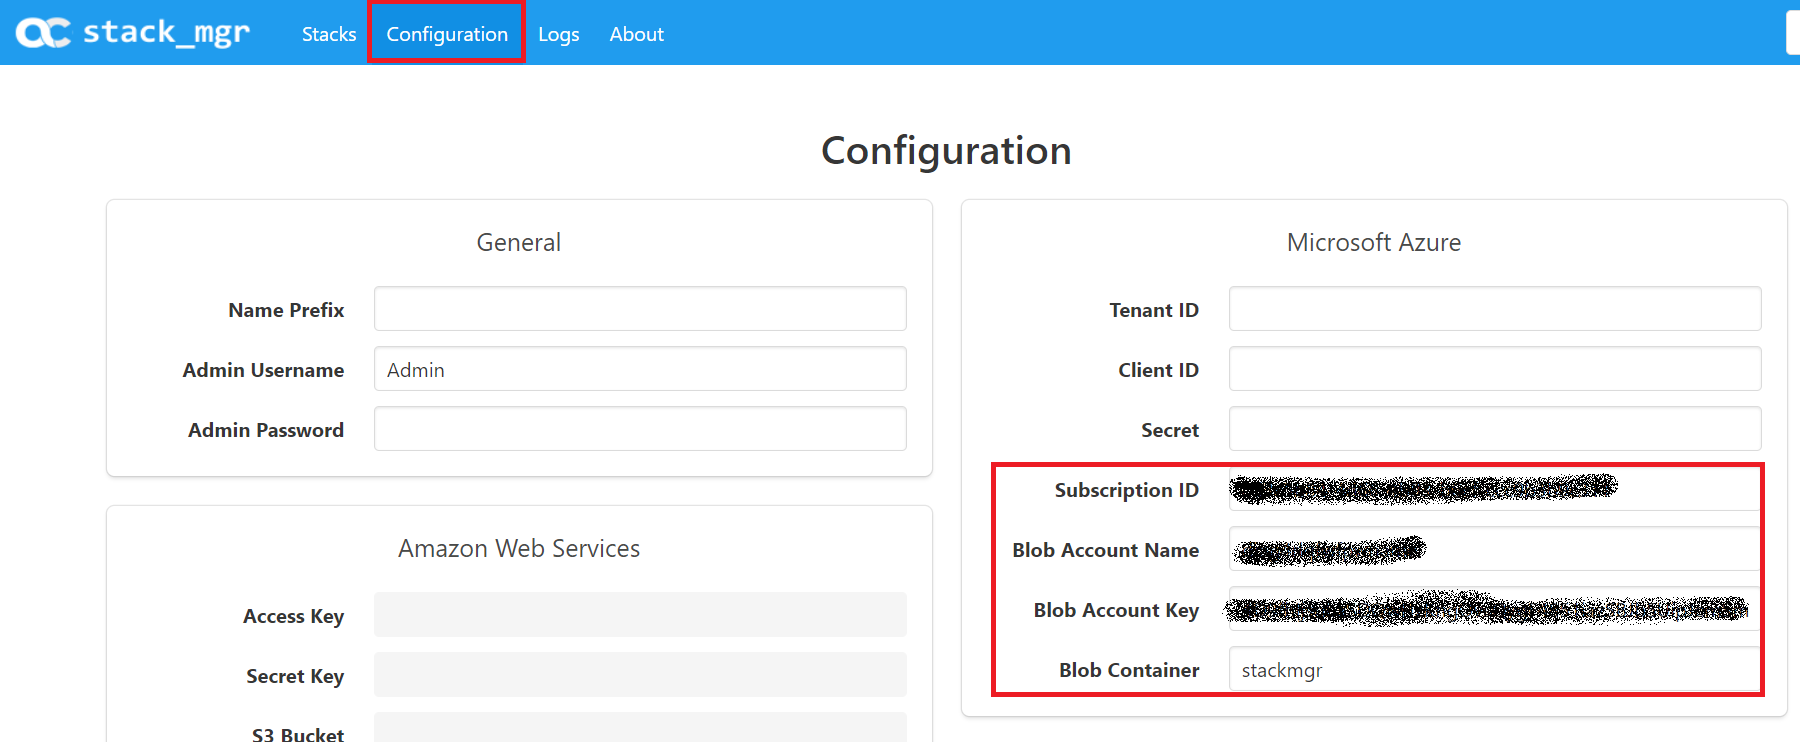
To complete the configuration of the SM so the SM can communicate with your Azure tenant the following information is required:-
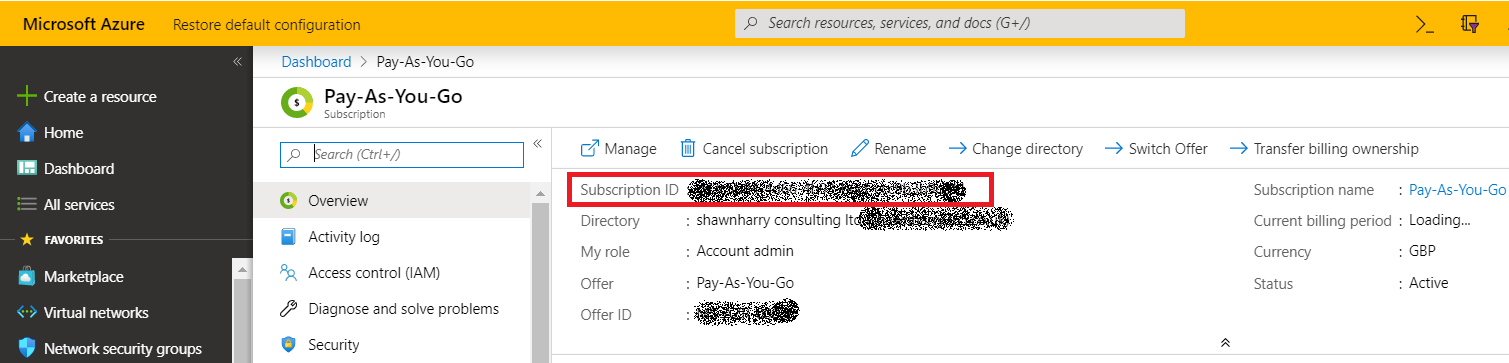
- Subscription ID
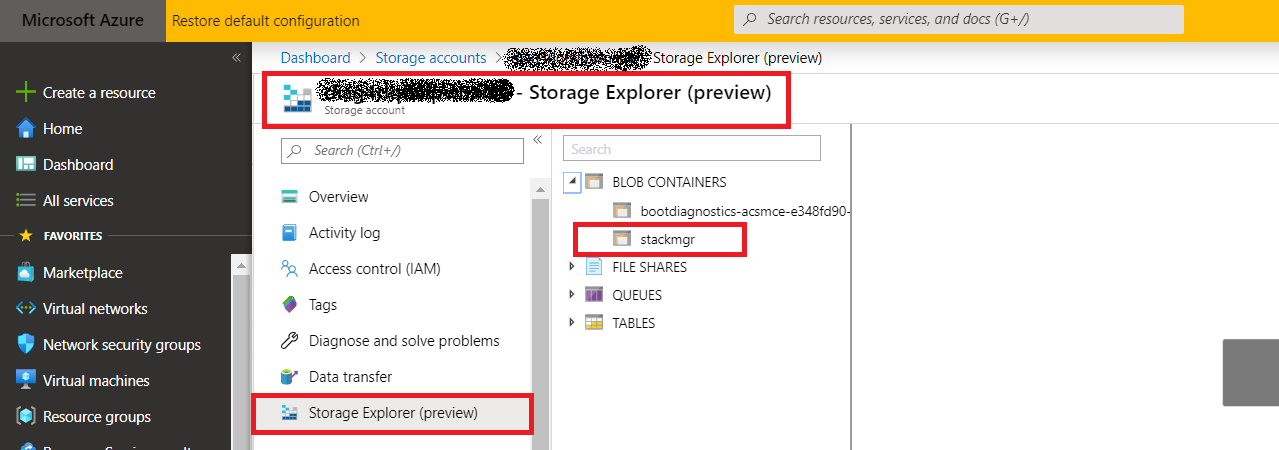
- Storage Account Name
- Storage Account Key
- Storage Container
Your Subscription ID can be found under your subscription in the Azure portal.
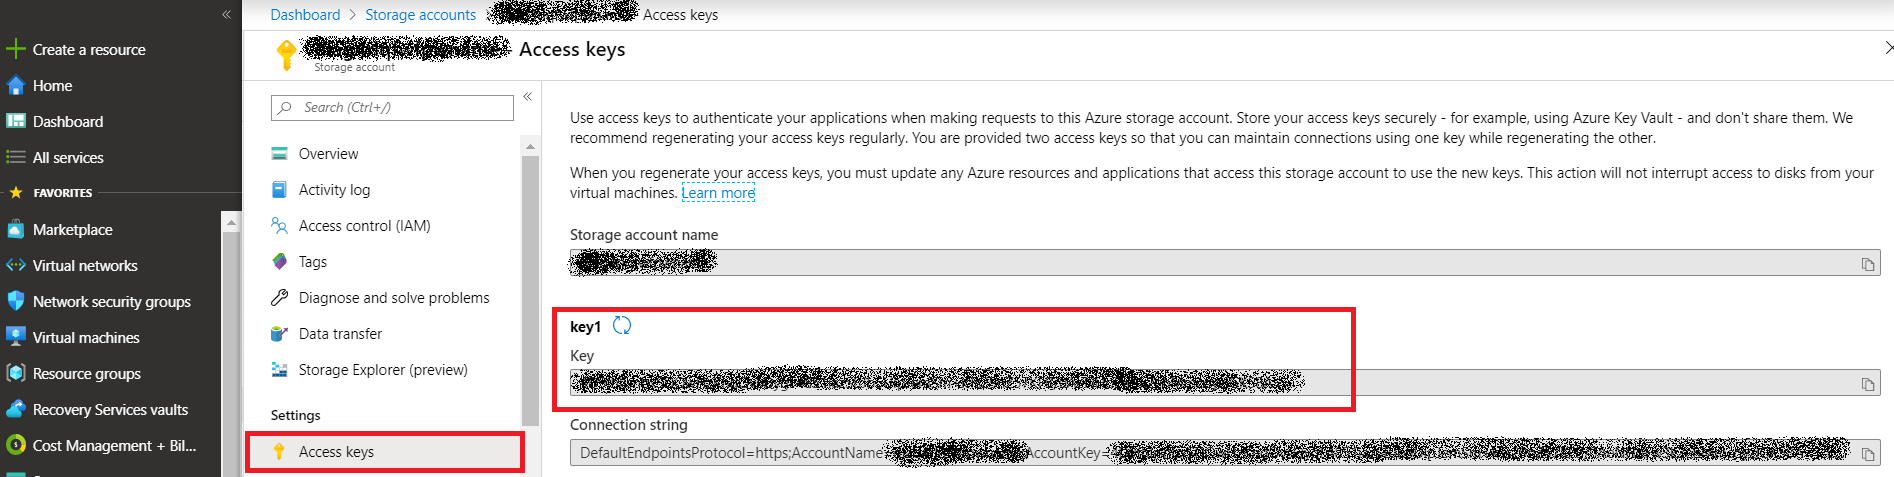
Browse to the storage account that was created when you installed the SM or alternatively create a new storage account and create a new container.
From the Access Keys section in the storage account copy any one of the access keys
From the SM portal select configuration and enter the details above into the Microsoft Azure section. Click update, then verify and you should see successful verification of the Stack Managers access to your tenant and the Azure API’s.
Note: – The SM does have a Command Line Interface but for ease of configuration the web UI is simpler for configuring the SM and creating the CE SBC stack.
CE SBC Stack Installation
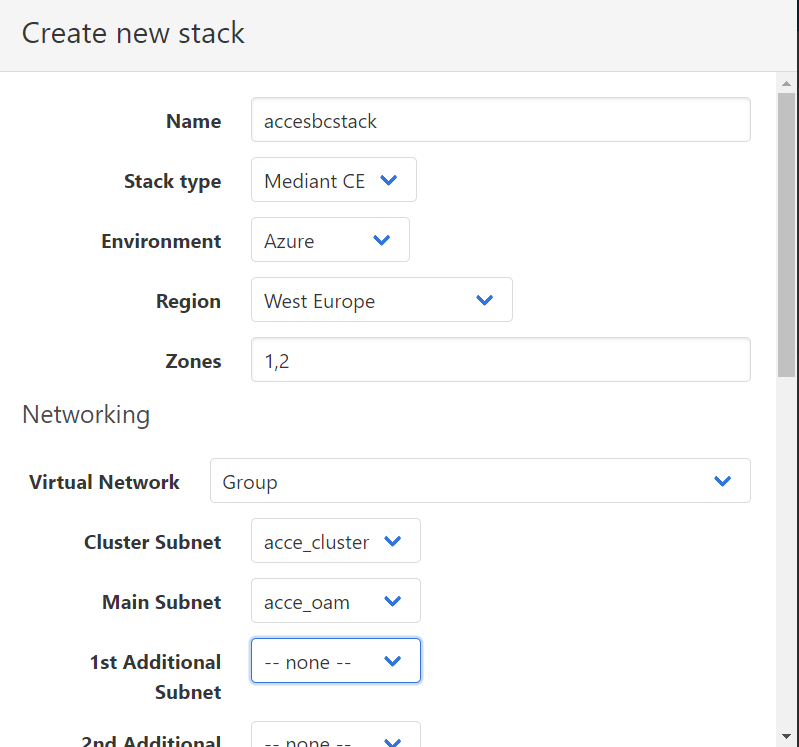
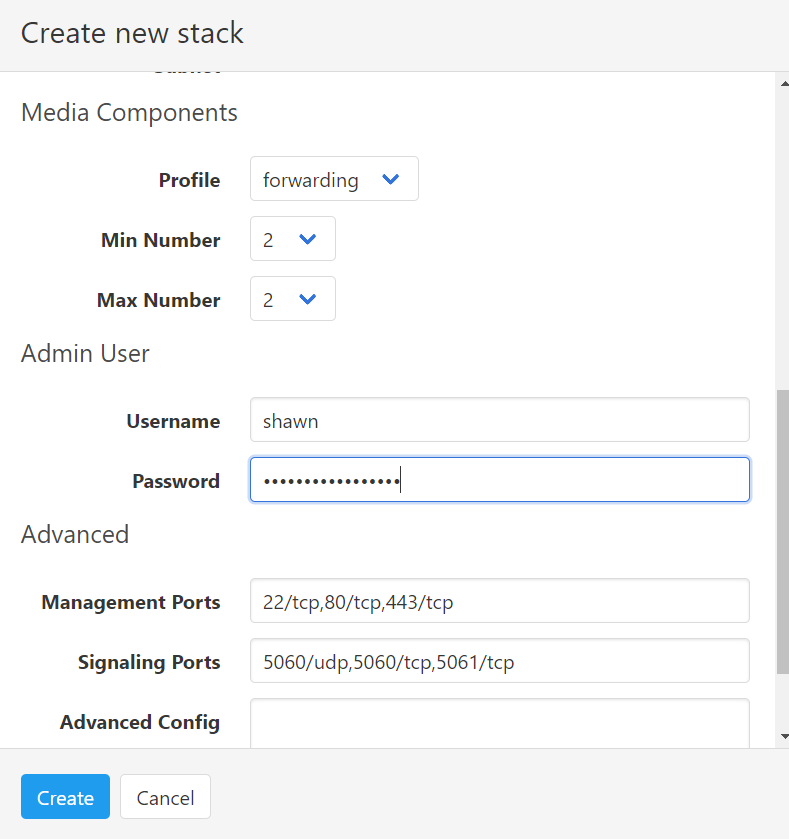
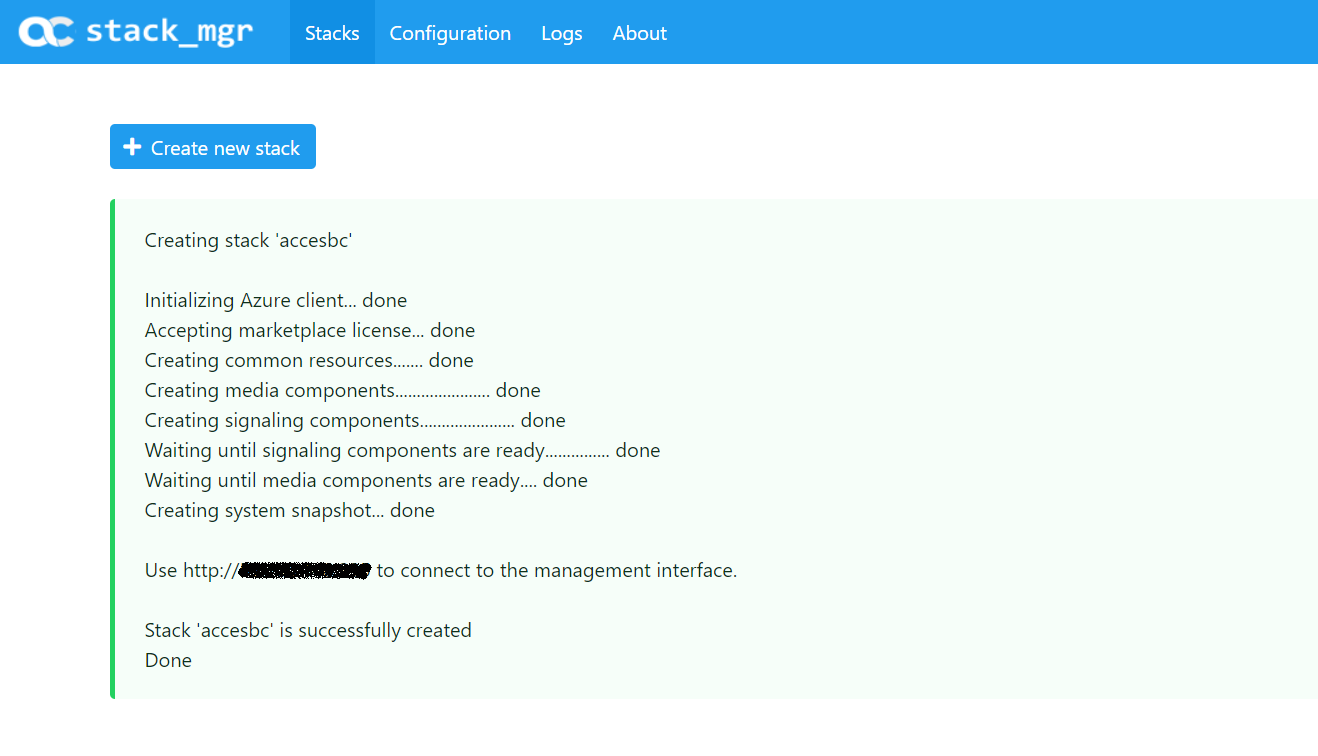
Select “create new stack” and complete the details below relevant to your network and region requirements.
Note: – The Virtual Network menu is actually the Resource Group you will deploy the stack to.
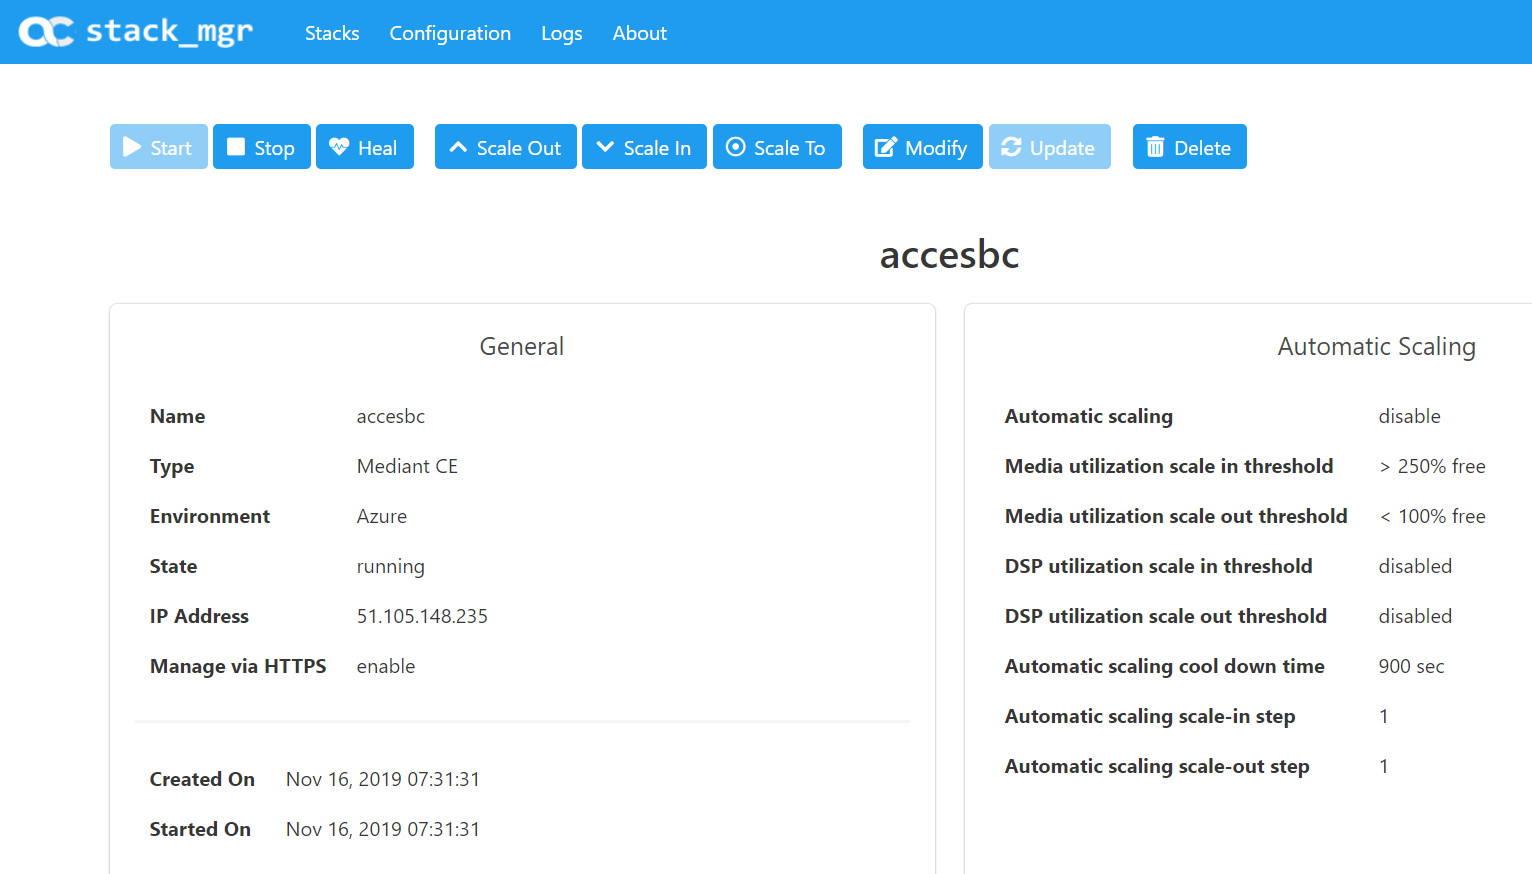
When completed you should see the following reported in the SM web portal. The CE SBC is now ready to be accessed on its IP address and configured to communicate with your PBX.
Note: – Each SC must be licensed in order for the stack to be functional. MC’s do not require licensing.
From the Azure Portal you will see the SC and MC nodes created per the minimum selected in your configuration.

The life cycle of the stack and its configuration can be managed from the SM portal. I’m now going to delete mine as its costing me a lot of money!
I used the following manuals for this post.
https://www.audiocodes.com/media/13247/stack-manager-for-mediant-ce-users-manual-ver-72.pdf
https://www.audiocodes.com/media/13453/mediant-cloud-edition-sbc-installation-manual-ver-72.pdf